Top 18 Foods to Relieve Your Cough and Cold

top 18 foods that help relieve cough and cold

Its winter and that means many people have coughs and colds. Did you know several foods can help alleviate coughing and promote faster recovery? This article will discuss the top foods that can provide relief from cough and cold. Incorporating these foods into your diet can boost your immune system and also soothe sore throat and coughing.

What is a cough?

A cough is a sudden and forceful expulsion of air from the lungs. It’s a reflex action that helps to clear the airways of irritants, mucus, or foreign particles.

Common Causes of Coughs

  • Viral Infections: Colds, flu, and other respiratory infections are frequent culprits.
  • Allergies: Allergens like pollen, dust mites, and pet dander can trigger coughing.
  • Postnasal Drip: Excess mucus draining from the sinuses can irritate the throat.
  • Gastroesophageal Reflux Disease (GERD): Acid reflux can irritate the throat and cause coughing.
  • Chronic Obstructive Pulmonary Disease (COPD): Conditions like bronchitis and emphysema can cause chronic coughing.
  • Smoking: Smoking irritates the airways and damages lung tissue, leading to coughing.

Types of cough

There are many types of cough, but the most straightforward way to classify them is if there is a dry or wet cough.

Wet cough (productive cough)

This type of cough produces mucus or phlegm, which can be clear, white, yellow, green, or even bloody. It is often associated with respiratory infections such as colds, bronchitis, pneumonia, and sinusitis.

Dry cough (non-productive cough)

This type of cough does not produce any mucus and is often described as being tickly, scratchy, or hoarse. It can be caused by various conditions, including allergies, asthma, acid reflux, and postnasal drip.

Home remedies for cough

1. Honey

Free Delicious honey pouring slowly from a spoon into a white bowl, highlighting its golden hue and viscosity. Stock Photo
honey

Honey has long been used as a natural remedy for coughs. It can help to coat the throat and soothe irritation. A small spoonful of honey can be taken directly or mixed into warm water or tea. However, honey should not be given to children under the age of 1 year due to the risk of botulism

2. Warm liquids

Free Glass cup of herbal tea with yellow flowers on a textured background. Stock Photo
tea

Warm liquids such as tea, broth, or water can help to loosen mucus and soothe a sore throat.  Adding lemon and honey to warm water or tea can provide additional relief.

3. Ginger

Free Close-up of fresh ginger root with sliced pieces and ginger powder spilled from a metal container. Stock Photo
ginger

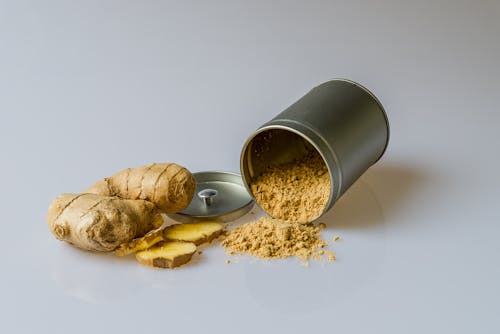
Ginger is a natural anti-inflammatory that can help to soothe a cough and loosen mucus. It can be consumed in various ways, such as ginger tea, ginger ale, or candied ginger.

4. Turmeric

Free Top view of small heaps of ground chili and curcuma powders in metal bowl on white surface Stock Photo
Turmeric powder

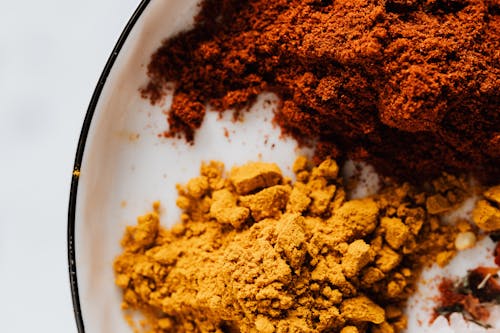
Turmeric is another anti-inflammatory spice that can help to soothe a cough. It can be added to warm milk or taken as a supplement

5. Lemon

Free Close-up of fresh, juicy lemon halves on a clean white background. Stock Photo
lemon

Lemons are a good source of vitamin C, which can help to boost the immune system and fight off infection. They can also help to soothe a sore throat and loosen mucus. Lemon juice can be added to warm water or tea, or taken directly.

6. Garlic

Free A close-up photo of peeled garlic cloves arranged on a decorative plate, highlighting their freshness. Stock Photo
Garlic

Garlic is a natural antibiotic that can help to fight off infection. It can be added to soups, stews, or other dishes.

7. Onion

Free Close-up of hands slicing purple onions on a white cutting board with a sharp knife. Stock Photo
onion

Onions are another natural antibiotic that can help to fight off infection. They can be added to soups, stews, or other dishes.

8. Pineapple

Free High-quality image of a fresh pineapple on a blue background, highlighting tropical healthiness. Stock Photo
Pineapple

Pineapple contains bromelain, an enzyme that can help to reduce inflammation and loosen mucus. It can be eaten fresh or juiced.

9. Pomegranate

Free Detailed macro shot of a fresh, vibrant pomegranate exposing its juicy seeds. Stock Photo
Pomegranate

Pomegranates are a good source of antioxidants, which can help to boost the immune system. They can be eaten fresh or juiced.

10. Peppermint

Free Vibrant close-up view of fresh mint leaves, showcasing their vibrant texture and color. Stock Photo
Peppermint

 Peppermint can help to soothe a cough and loosen mucus. It can be consumed in various ways, such as peppermint tea, peppermint candy, or peppermint oil.

11. Licorice root

Licorice Root: Benefits, Uses, Precautions, and Dosage
Phot credit: Healthline

Licorice root is a natural expectorant that can help to loosen mucus. It can be taken as a supplement or made into a tea.

12. Marshmallow root

Marshmallow root: Benefits, risks, and uses
Phot credit: MedicalNewsToday

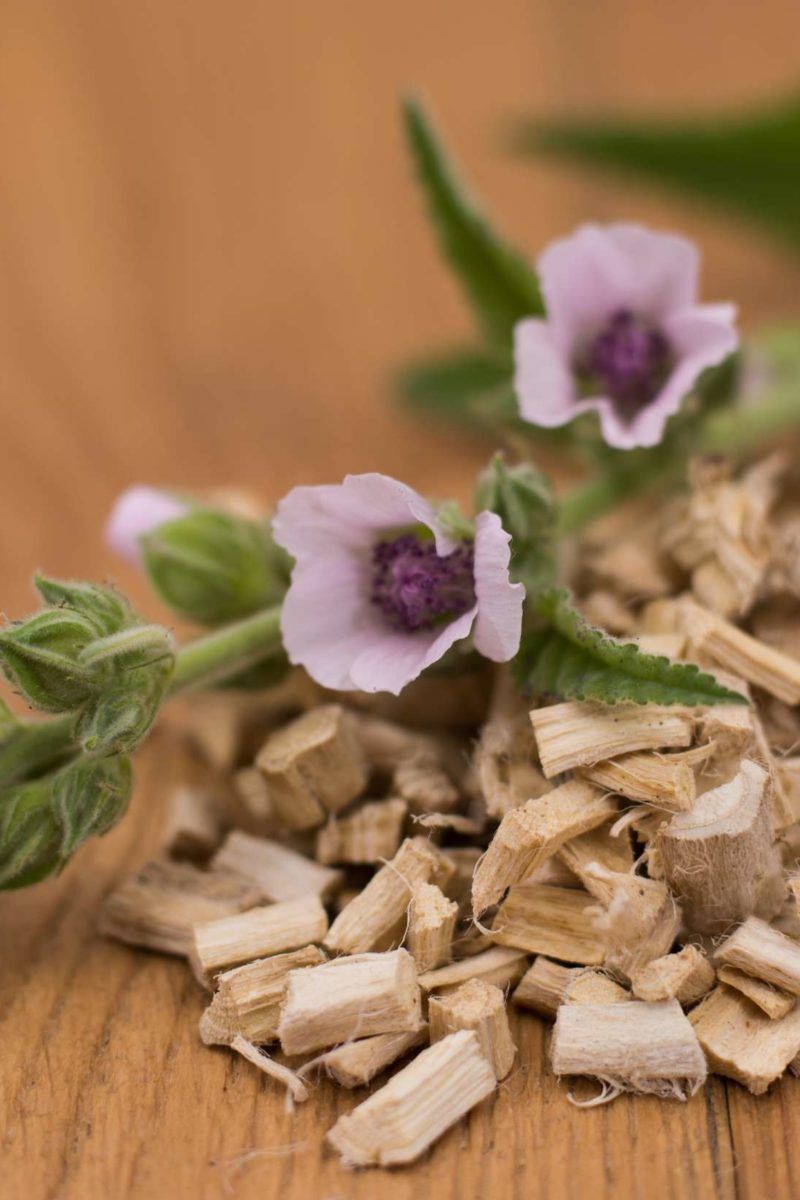
Marshmallow root is a natural demulcent that can help to soothe a sore throat and cough. It can be taken as a supplement or made into a tea.

13. Slippery elm

Slippery Elm : Indigenous Peoples' Perspective Project : Programs | Events : Adkins Arboretum
Photo credit: Adkins Arboretum

Slippery elm is a natural demulcent that can help to soothe a sore throat and cough. It can be taken as a supplement or made into a tea.

14. Chicken soup

Free Delicious homemade chicken soup garnished with fresh parsley, served on a rustic table setting. Stock Photo
Chicken soup

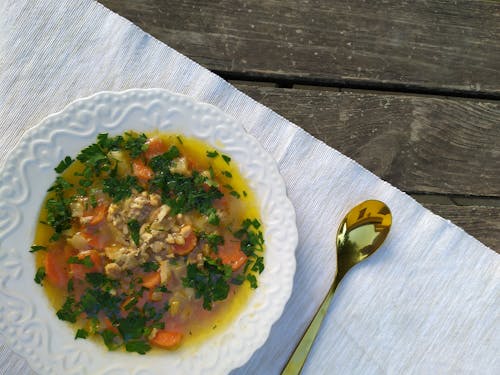
Chicken soup is a classic home remedy for colds and coughs. It is easy to digest and can help to hydrate and nourish the body.

15. Vegetable soup

Free A steaming ladle of chicken broth with carrots and herbs, perfect for a cozy meal. Stock Photo
Vegetable soup

Vegetable soup is another good option for colds and coughs. It is packed with nutrients and can help to hydrate and nourish the body.

16. Yogurt

Free Top view of a white cup filled with yogurt and assorted berries on a pink background. Stock Photo
Yogurt

Yogurt is a good source of probiotics, which can help to boost the immune system. It can also help to soothe a sore throat.

17. Bone broth

Free Close-up of hands holding a cup of bone broth beside a package on rustic table. Stock Photo
Bone broth

Bone broth is a nutrient-rich soup that can help to boost the immune system and soothe a cough.

18. Water

Free A close-up shot of a hand holding a clear glass of water, symbolizing refreshment. Stock Photo
Glass of water

Drinking plenty of water is important for staying hydrated when you have a cough. Water can also help to thin mucus and make it easier to cough up.

Bonus

Nigerian Pepper Soup 🇳🇬

Nigerian Pepper Soup- Assorted Meat Pepper Soup - Sisi Jemimah
From Sisi Jemima

Nigerian pepper soup is packed with lots of proteins and vitamins( from the pepper). If you can handle spicy food, definitely try it for an instant cough relief.

Disclaimer: It is important to note that these foods do not cure a cough, but they may help to soothe symptoms and shorten the duration of the illness. If your cough is severe, persistent, or accompanied by other symptoms such as fever, shortness of breath, or chest pain, it is important to see a doctor to determine the cause and get appropriate treatment.

Chicken soup recipe

Ingredients

– Chicken: 1 lb (bone-in or boneless chicken thighs or breasts)

– Chicken broth: 8 cups

– Vegetables:

  – 2 carrots, sliced

  – 2 celery stalks, sliced

  – 1 onion, chopped

  – 2 cloves garlic, minced

  – 1 cup potatoes or noodles (optional)

– Seasonings:

  – 1 tsp dried thyme

  – 1 tsp dried parsley (or fresh, chopped)

  – 1 bay leaf

  – Salt and pepper, to taste

– Olive oil or butter: 2 tbsp

– Fresh herbs (optional): Chopped parsley or dill for garnish

Instructions

1. Cook the Chicken

   – In a large pot, heat the olive oil or butter over medium heat.

   – Add the chicken and cook until lightly browned on both sides (about 5–7 minutes). Remove and set aside.

2. Sauté the Vegetables

   – In the same pot, sauté the onion, carrots, and celery for 4–5 minutes until softened.

   – Add the garlic and cook for another minute until fragrant.

3. Simmer the Soup

   – Pour in the chicken broth and add the thyme, parsley, bay leaf, salt, and pepper.

   – Return the chicken to the pot. If you’re using bone-in chicken, it will add extra flavor.

   – Bring the soup to a boil, then reduce the heat and let it simmer for 20–25 minutes until the chicken is cooked through.

4. Add Potatoes or Noodles (Optional)

   – If using potatoes, add them in the last 15 minutes of cooking.

   – For noodles, add them in the last 8–10 minutes, depending on the type.

5. Shred the Chicken

   – Remove the chicken, shred it using two forks, and return it to the pot.

6. Final Touches

   – Taste and adjust the seasoning.

   – Remove the bay leaf before serving.

   – Garnish with fresh parsley or dill, if desired.

Serving Suggestions

Serve hot with crusty bread or crackers on the side for a comforting meal.

Nigerian Pepper Soup

A popular dish known for its aromatic spices and comforting heat. This recipe is great with meat, fish, or chicken.

Ingredients

– Protein:

  – 1.5 lbs of goat meat, chicken, fish, or assorted meats (e.g., tripe, liver, etc.)

– Water: 6 cups (adjust as needed)

Spices and Seasonings

– 2 tbsp Pepper Soup Spice Mix (available in African stores or homemade; see below for mix)

– 1–2 tsp ground crayfish (optional, adds depth)

– 2–3 scotch bonnet peppers (ata rodo), chopped or blended (adjust to heat preference)

– 1 tbsp ground uziza seeds (optional but traditional)

– 2 seasoning cubes (Maggi or Knorr)

– Salt, to taste

Aromatics

– 1 small onion, finely chopped

– 2 cloves garlic, minced

– 1-inch piece of ginger, minced (optional)

– Handful of scent leaves or nchuanwu (substitute with basil if unavailable)

Instructions

1. Prepare the Protein

   – Wash the meat or fish thoroughly.

   – If using meat, cut into bite-sized pieces. For fish, clean and leave in chunks to prevent breaking apart during cooking.

2. Cook the Protein

   – In a pot, add the meat, chopped onions, garlic, ginger (if using), seasoning cubes, and salt.

   – Add enough water to cover the meat and bring to a boil. Simmer on medium heat for 20–30 minutes (or until tender).

3. Add the Spices

   – Add the pepper soup spice mix, crayfish (if using), uziza seeds, and scotch bonnet peppers.

   – Stir well and let it cook for another 10–15 minutes. Adjust the water for your desired consistency.

4. Taste and Adjust

   – Check for salt and seasoning. Add more if needed.

   – If using fish, carefully add it at this stage and cook for an additional 5–7 minutes until done.

5. Add the Scent Leaves

   – Add chopped scent leaves or basil just before taking the pot off the heat. Let it simmer for 1–2 minutes to release the flavor.

6. Serve

   – Serve hot, either on its own or alongside white rice, yam, or plantains.

Homemade Pepper Soup Spice Mix (Optional)

If you can’t find pre-made spice, grind these into a fine powder:

– 1 tbsp uziza seeds

– 1 tbsp ehuru (calabash nutmeg)

– 1 tsp cloves

– 1 tsp alligator pepper

Store in an airtight container for future use.

Conclusion

Coughing is a common reflex that helps clear your airways of irritants. While occasional coughs are normal, persistent or severe coughs can indicate an underlying health condition. Recognizing the type of cough you have, such as a wet or dry cough, can provide clues about the possible cause.

Remember: Home remedies like honey, warm fluids, and certain foods may provide temporary relief, but they are not a substitute for medical advice.

If your cough is severe, persistent, or accompanied by other symptoms like fever, shortness of breath, or chest pain, it’s essential to consult a healthcare professional for proper diagnosis and treatment.

This is for informational purposes only. For medical advice or diagnosis, consult a doctor.

Did you find this article helpful? Leave a comment below.


How to Take Care of Yourself When You Are on Your Period: Period Self Care Tips

Periods bring a range of challenges, from painful cramps and fatigue to mood swings that can make daily life feel more difficult. During this time, it’s essential to prioritize your self-care to help ease these discomforts and promote overall well-being.

In this article, we’ll explore practical and soothing tips to help you manage your period with more comfort and care, so you can feel your best throughout the month.

Don’t be angry with yourself for staining, get up, clean up and reward yourself with a soothing cup of tea.

1. Prioritize Comfort

Periods can often leave you feeling physically drained, so prioritizing comfort is essential. 

Use a Heating Pad

Heating pad for cramps

Applying a heating pad or hot water bottle to your lower abdomen or back can work wonders for relieving cramps. The warmth helps to relax the muscles and improve blood flow, reducing the intensity of pain.

Take Warm Baths

A warm bath can soothe your body and mind. Add Epsom salts or a few drops of calming essential oils like lavender to your bath for added relaxation.

Wear Comfortable Clothing

When you’re on your period, tight or restrictive clothing can add to your discomfort. Opt for loose-fitting, breathable outfits that let you feel cozy and at ease throughout the day. Wear cute socks and clean clothes.

Prioritize Rest

Your body works overtime during your period, so give it the rest it deserves. Take naps, go to bed earlier, or simply allow yourself some downtime to recharge. 

2. Nourish Your Body

During your period, your body needs extra care and nourishment to keep energy levels up and support your overall well-being. Eating the right foods can help ease discomfort and even improve your mood.

Eat Iron-Rich Foods

Free A close-up of spicy kimchi and vegetables on a black plate, perfect for food enthusiasts. Stock Photo

Menstruation can deplete your iron levels, leaving you feeling fatigued. Incorporate foods like spinach, lentils, red meat, tofu, and fortified cereals into your diet to replenish your iron stores.

Opt for Anti-Inflammatory Choices

Certain foods, like fatty fish (salmon, mackerel), nuts, seeds, and leafy greens, are rich in omega-3 fatty acids and other anti-inflammatory compounds that can help reduce cramping and bloating.

Stay Hydrated

Free Woman enjoying a warm drink in a cozy armchair by a window, embracing relaxation. Stock Photo

Drinking plenty of water is crucial to combat bloating and fatigue. Herbal teas like chamomile or peppermint can also soothe cramps and improve digestion.

Limit Sugar and Caffeine

High sugar and caffeine intake can lead to energy crashes, increased bloating, and heightened mood swings. Opt for natural sweeteners like honey and herbal teas to stay balanced.

Indulge in Dark Chocolate

If you’re craving something sweet, dark chocolate (70% cocoa or higher) is a great choice. It’s rich in magnesium, which can help relax muscles and improve your mood.

3. Prioritize Rest and Sleep

Your body works harder during your period, so giving it the rest it deserves is essential for feeling your best. Prioritizing quality sleep and relaxation can help alleviate period symptoms and boost your energy.

Get Enough Sleep

Free A close-up of a hand reaching for a ringing alarm clock, symbolizing waking up in the morning. Stock Photo

Aim for 7-9 hours of restful sleep each night. Sleep helps your body recover and reduces stress, which can worsen cramps and mood swings. If you’re struggling to sleep due to discomfort, try using a heating pad or taking a warm bath before bed.

Nap if Needed

If you feel drained during the day, give yourself permission to take short power naps. Even 20–30 minutes of rest can improve your mood and energy.

Practice Relaxation Techniques

Meditation, praying and journaling can calm your mind and relax your body. These practices can help reduce pain and ease tension, especially during particularly challenging days.

Create a Relaxing Sleep Environment

Make your bedroom as comfortable as possible by dimming lights, keeping the room cool, and using soothing scents like lavender to promote relaxation.

Listen to Your Body

 If you feel too tired to complete your usual activities, allow yourself to take a break. Resting doesn’t mean being unproductive; it’s a necessary part of self-care.

Conclusion  

Remember that your body is going through a natural process. Be patient with yourself and understand that you may not feel your best during this time. Periods can be physically and emotionally challenging. Self-compassion is not indulgence, it’s about honoring your needs and giving yourself the support you deserve.

Even small acts of self-care can make a significant difference in how you feel during your period. A warm bath, a cup of herbal tea, or a few minutes of meditation can all contribute to a more positive experience.

Did you find this article helpful? Leave a comment below


The 15 Dirtiest Things You Touch Everyday

We all know about washing our hands regularly, but how often do we think about what we touch? Many everyday items harbor germs and bacteria that could make us sick. 

1. Cellphone

Free A woman using her phone at a desk, surrounded by art supplies and a laptop, in a creative workspace. Stock Photo
Phone

Your trusty smartphone is a bacteria magnet. Between frequent use, being carried everywhere, and rarely being cleaned, studies show that phones are often dirtier than toilet seats. Wash your hands after using the toilet, and wipe your phone frequently with electronics wipes.

2. Remote Control

Free A couple enjoying a relaxing movie night, sitting on a sofa with popcorn and a TV remote. Stock Photo
Remote control

Everyone touches the remote. From greasy popcorn fingers during movie nights to dust buildup, remote controls are touched by many hands and rarely sanitized. Germs love this hotspot. 

How to clean your remote control

Use a dry cotton swab to remove visible dust and debris inside the remote. Next, dampen another cotton swab with isopropyl alcohol and gently clean the circuit board and other internal components. Be cautious not to use too much moisture, as it could damage the electrical parts. If the remote has rubber buttons, clean them thoroughly as well.

3. Laptop Keyboards

Free Child focused on laptop wearing headphones at desk with purple lighting. Modern tech scene. Stock Photo
Laptop

Eating lunch while working? Your keyboard collects crumbs, oils, and bacteria. It’s a breeding ground for germs, especially if multiple users share it.

How to clean your Laptop Keyboard

  1. Turn off and unplug the laptop.
  2. Use a soft brush or cloth to remove loose debris gently.
  3. Wipe the keys with a cloth lightly dampened with water or a mild cleaning solution.
  4. Allow the keyboard to air dry completely before reconnecting.
  5. Avoid harsh chemicals and excessive liquid to prevent damage.

4. Dish Sponge

Free Close-up of woman washing dishes at kitchen sink, highlighting hands with bracelet. Stock Photo
Dish sponge

While it’s designed for cleaning, the dish sponge is one of the dirtiest items in your kitchen. Warm, moist environments help bacteria thrive, making regular replacement crucial.

Many people use microwaves to clean their sponges; however, you can also clean your dish sponge by soaking it in hot water.

Fill a small bowl with hot water or white vinegar and soak the sponge. Let it sit for five minutes, and then rinse it out and let it air dry.

5. Toothbrush

Free Macro shot of a toothbrush with blue toothpaste and blurred background. Stock Photo
Toothbrush

Your toothbrush spends time in a humid bathroom where airborne particles from flushing toilets can settle on it. Store it upright and away from the bathroom to minimize exposure.

6. Pet Toys

Free A happy chocolate Labrador Retriever playing tug-of-war with a colorful toy inside a cozy home. Stock Photo
Pet toys

Your furry friend’s favorite toy collects drool, dirt, and bacteria. Regular washing with pet-safe cleaners can keep your pets—and you—safe.

7. Money

Free Close-up of person counting cash with notepad on desk, indicating financial tasks. Stock Photo
Money

Cash constantly changes hands, picking up bacteria, dirt, and even viruses. It’s wise to wash your hands after handling it. 

8. Laundry

Free A woman pours detergent into a washing machine for a laundry cycle. Stock Photo
Laundry

Dirty laundry, especially gym clothes or towels, can carry germs, mold, and odors. Wash them promptly to avoid bacteria buildup.

9. Your Purse

Free Close-up of a stylish black purse held by a person outdoors, showcasing elegance and fashion. Stock Photo
purse

Purses go everywhere, from the floor of public restrooms to counters and car seats. The bottom of your bag is a hotspot for bacteria and dirt.

10. ATM Keypads

Free A person wearing gloves withdrawing cash from an ATM machine showcasing money handling and hygiene. Stock Photo
ATM

Used by hundreds daily, ATM keypads are rarely cleaned and frequently touched by unwashed hands. A quick hand sanitizer rub afterward can help.

11. Shopping Cart Handles

Free An empty shopping cart lies abandoned on a patch of grass by the roadside. Stock Photo
Shopping cart

Countless people, including children, touch shopping cart handles. These handles often carry germs from raw food items and dirty hands.

12. Soap Dispensers

Ironically, the soap dispenser pump is full of germs because people touch it with dirty hands before washing it. Automatic dispensers reduce this risk.

Free A close-up of a hand dispensing soap from a bottle, showcasing hygiene and cleanliness concepts. Stock Photo
soap dispenser

13. Kitchen Towels

Free A person wearing rubber gloves cleaning a dirty gas stove with a cloth and spray bottle. Stock Photo

Kitchen towels are used for everything, from drying hands to wiping spills. When damp, they become a breeding ground for bacteria, so they should be washed frequently.

14. Light Switches

Light switches are touched multiple times a day but rarely cleaned. Regular disinfecting can keep germs at bay.

15. Steering Wheels

We eat, drink, and touch various things before grabbing the wheel, so it’s no surprise that car steering wheels often harbor bacteria and dirt.

Bonus

16. Makeup Brushes

Free A woman prepares her makeup in a stylish indoor setup, surrounded by beauty products. Stock Photo

Makeup brushes collect oils, dead skin cells, and product buildup with every use. If not cleaned regularly, they become a breeding ground for bacteria, leading to skin issues like acne and irritation.

How to clean your makeup brush

Fill a bowl with lukewarm water and add a tablespoon of gentle or clarifying shampoo. Avoid using plain soap and water, as it can dry out the bristles. Swirl the tip of each brush in the bowl to loosen dirt and makeup residue. For a deeper clean, gently massage the brush tips in the palm of your hand to create a rich lather.

Tips to Keep Germs Away

  • Clean high-touch surfaces regularly with disinfectant wipes or sprays.
  • Wash hands thoroughly and frequently.
  • Avoid touching your face, especially after handling any of these items.
  • Be mindful of shared items and sanitize them often.

By being aware of these germy culprits, you can protect yourself and your loved ones from unnecessary exposure to harmful bacteria. 

Did you find this article helpful? Leave a comment below.

Energy Drains vs Energy Gains

Energy Drains Vs Energy gains

Do you ever feel drained entirely by midday? Are you wondering where all your energy went? Or have you experienced days when you feel unstoppable, full of motivation and vitality? The difference often lies in the subtle choices we make every day.

Energy drains are those habits, activities, or even environments that quietly sap your strength, leaving you tired, stressed, or unproductive. On the other hand, energy gains are the nourishing routines and uplifting moments that recharge your mind, body, and spirit.

Common Energy Drains

Energy drains can sneak into your life through habits, environments, and choices that initially seem harmless but add up over time, leaving you exhausted and unmotivated. Identifying these drains is the first step toward regaining control of your energy. 

1. Not getting enough sleep

Free An Asian woman lying awake in bed, reflecting on her thoughts during a sleepless night. Stock Photo
Not getting enough sleep

Sleeping less than 8 hours a night disrupts your body’s natural recovery process, leaving you tired and sluggish.  

2. Eating too much sugar

Free A stack of doughnuts covered in colorful fruity pebbles on a plate. Stock Photo
Sugar doughnuts

Sugar causes energy spikes followed by inevitable crashes, making you feel drained.  

3. Drinking too much coffee

Free A warm coffee sits beside a notebook and smartphone on a foggy day. Stock Photo
Too much coffee

More than one cup of coffee daily can lead to jitteriness and disrupt your sleep, creating a fatigue cycle.  

4. Skipping meals

Missing meals deprives your body of essential nutrients and energy, leading to sluggishness.  

5. Eating junk and processed food

Free Delicious cheeseburger with fries and ketchup served on a wooden plate, perfect for lunch or snack. Stock Photo
Fast food

Foods made in factories, such as chips and fast food, provide empty calories that don’t effectively fuel the body.  

6. Consuming bread and dairy excessively

Free Warm banana bread with a glass of milk on a wooden table in a cozy cafe ambiance. Stock Photo
Milk

These can cause bloating or fatigue in some people, especially if they are sensitive to these foods.  

7. Drinking too much alcohol

Free An array of various liquor bottles beautifully displayed on a bar shelf. Stock Photo
Alcohol

More than three glasses of wine or other alcoholic drinks per week can negatively affect your sleep and energy levels.  

8. Working too much

Free A person working on a laptop in a warmly lit cafe in London, England. Stock Photo
Working too much

Long hours without proper breaks can lead to burnout and mental fatigue.  

9. Spending excessive time on screens

Too much time on the computer or watching TV strains your eyes and diminishes your mental focus.  

10. Skipping exercise

Not moving your body at least four times a week reduces your physical stamina and energy levels.  

11. Staying indoors all-day

Free African American woman reading a Braille book on a couch, emphasizing disability pride and literacy. Stock Photo
Staying indoors

Lack of fresh air and sunlight can lead to feelings of lethargy and even lower your mood.  

12. Neglecting meaningful connections

Not spending time with friends or loved ones can leave you feeling isolated and emotionally drained.  

13. Toxic Relationships  

Free A couple sits in tension on a bench surrounded by nature, holding colorful blocks spelling 'Love'. Stock Photo
toxic relationships

Hostile or manipulative individuals can drain your energy by fostering feelings of stress, self-doubt, or emotional exhaustion. Examples are constant complainers, overly critical people, or those who don’t respect your boundaries.

14. Overcommitting Socially  

Saying “yes” to every invitation or favor can drain your time and energy, leaving little room for rest or self-care.

15. Shallow Connections  

Free A comforting scene of empathy and support between two women sitting on a sofa indoors. Stock Photo
shallow connections

Engaging in surface-level conversations or spending time with people who don’t align with your values can feel unfulfilling and draining.

16. Excessive Social Media Use  

Free A person's hand holding a smartphone displaying social media and communication apps. Stock Photo
social media

Mindlessly scrolling through social media can lead to comparison, FOMO (fear of missing out), and reduced mental clarity.

17. Neglecting Alone Time  

Alone time is important so you can process your feelings and rejuvenate your energy. Use your time alone to work and journal and reflect.

Why Does Addressing Energy Drains Matters  

Ignoring these energy drains can lead to long-term consequences, including chronic fatigue, decreased productivity, and emotional burnout. You can begin making small but impactful changes to reclaim your vitality by identifying which drains affect you the most.  

Before you can eliminate energy drains, you need to identify what’s depleting your energy in the first place. While some drains are universal—like poor sleep or unhealthy eating—others may be unique to your lifestyle, environment, or habits.

How To Pinpoint Your Biggest Energy Drains

Take a few days to track your activities, emotions, and physical feelings. Write down

What are you doing at various points in the day?

  • How does each activity make you feel—energized or drained?  
  • Do you notice any patterns, like feeling exhausted after certain meals or sluggish during specific tasks?

Example: Do you feel fatigued after spending hours on your computer? Or does a late-night snack leave you struggling to wake up?  

Common Energy Gains

Now that you’ve identified what’s draining your energy, it’s time to focus on the habits, activities, and routines that can recharge you. Energy gains are the practices that nourish your body, uplift your spirit, and sharpen your mind. Integrating these into daily life can boost your vitality and make you feel more balanced.

1. Eat a high-protein breakfast

Free Savor this delicious avocado toast topped with soft-boiled eggs and garnished with pomegranate seeds. Stock Photo
eggs

Start your day with foods like eggs or a protein shake to sustain energy levels throughout the morning.  

2. Focus on fresh, whole foods

Free Avocado, kale, and more fresh produce artfully arranged on a marble surface. Stock Photo
fresh produce

Incorporate unprocessed, nutrient-dense options like vegetables, fruits, and lean proteins. Aim for 10 servings of vegetables daily.  

3. Snack smart

Add protein-packed snacks mid-morning and afternoon to maintain consistent energy levels.  

4. Avoid late-night eating

Refrain from eating three hours before bedtime to ensure quality sleep.  

5. Take essential vitamins

Support your energy with multivitamins, fish oil, and vitamin D supplements.  

6. Stay hydrated

Free A young man drinks bottled water outside, staying hydrated and refreshed. Stock Photo
drink water

Drink 6-8 cups of filtered water daily to keep your body functioning optimally.  

7. Engage in outdoor activities

Free Friends having a fun picnic in the park with a Shih Tzu, enjoying a sunny day outdoors. Stock Photo
Picnic

Run in the woods, swim in lakes or rivers, or play sports like tennis to combine movement with nature’s rejuvenating power.  

8. Move regularly

Free Side view of a young woman jogging on a beach wearing pink active wear. Stock Photo
Run

Incorporate at least four weekly workouts to build stamina and improve physical health.  

9. Spend time in nature

Free An elegant woman in traditional Ao Dai appreciating the beauty of pink blossoms. Stock Photo
Nature

A short walk outside can boost your mood and energy.  

10. Hug loved ones

Free A couple embraces while walking in a sunlit park, conveying love and togetherness. Stock Photo
hug

Physical affection, like hugging your kids or spouse, can instantly lift your mood.  

11. Connect with friends

Spend quality time talking to friends or hosting dinner parties for meaningful connections.  

12. Help others

Volunteering or assisting someone in need fosters a sense of purpose and fulfillment.  

13. Cook for family and friends

Free A joyful family scene with a mother, father, and child preparing a meal in a modern kitchen. Stock Photo
Cooking with family

Being creative in the kitchen can be relaxing and rewarding.  

14. View your day as sacred

Treat each day like a blank canvas, intentionally shaping it to create joyful and meaningful experiences.  

15. Learn something new

Explore fascinating aspects of the world and the people around you to stay curious and inspired.  

Tips for Integrating Energy Gains

Incorporating these energy gains into your daily routine will significantly improve how you feel, think, and perform. The following section will explore strategies to balance energy drains and gains for a sustainable, energized life.

Start small

Replace one energy-draining habit with an energy-gaining one. For instance, swap a sugary breakfast with a high-protein alternative.  

Schedule gains into your day

Set aside time for activities that recharge you, like morning walks or evening socializing.  

Celebrate your wins

Acknowledge the positive changes you make, no matter how small—they add up over time.  

Strategies to Balance Energy Drains and Gains

Free A cheerful woman smiles at her reflection in a vintage-style mirror, exuding positivity and warmth. Stock Photo
Happy

Life is about balance, and while it’s impossible to eliminate all energy drains, you can learn to manage them effectively while maximizing your energy gains. Here are practical strategies to create a sustainable energy flow throughout your day.

Replace Drains with Gains

For every energy-draining habit you identify, aim to replace it with an energy-giving alternative.  

Instead of skipping breakfast (an energy drain), start your day with a high-protein breakfast (an energy gain).  

Swap excessive screen time with an outdoor walk or a creative activity like cooking.  

Set Boundaries Around Drains  

Not all energy drains can be eliminated, but you can manage their impact:  

  • Limit work hours by setting specific start and end times.  
  • Use apps or timers to restrict screen time.
  • Politely decline commitments that overextend your energy, focusing on what truly matters.

Prioritize Energy Gains in Your Routine  

Make energy-giving habits a non-negotiable part of your day.  

Morning: Start with a nourishing breakfast and light movement like stretching or walking.  

Midday: Take a break to enjoy a protein-rich snack, hydrate, and recharge with a short nature walk or a few minutes of mindfulness.  

Evening: End your day with a calming activity, like reading, journaling, or spending time with loved ones.  

Use an Energy Budget  

Treat your energy like money in a bank account—be intentional about how you spend it.  

  • Identify activities that drain your energy and limit how much time you devote to them.  
  • Invest your energy in activities that bring the highest returns, such as meaningful connections, exercise, and creative pursuits.

Pro Tip: Start your day with energy-giving activities to set a positive tone for the rest of the day.  

Create a Balance Plan  

Develop a strategy for balancing energy gains and drains:  

  • List your top 3 energy drains and a corresponding list of 3 energy gains.
  • Pair each drain with a gain to neutralize its impact.

Schedule a 10-minute midday walk to recharge if work drains you.  

Conclusion

Your energy isn’t just something you use—it’s something you can shape, build, and protect. Imagine waking up daily with the vitality and focus to do what you love and make meaningful progress toward your goals. That vision starts with small, intentional actions today.

Take the first step toward your energy transformation: swap one energy drain for an energy gain and watch the positive ripple effect unfold. *Your best, most energized self is waiting—go claim it!* 

Use an energy tracker to help you identify your energy drains and gains and build a routine that works for you! 

20 Secrets To a Good Night’s Sleep

person sleeping

Sleep is non-negotiable. Treat sleep as an essential part of your health and productivity, not an optional activity. We have compiled the best secrets to have the best sleep.

1. Stick to a Consistent Sleep Schedule

Go to bed and wake up simultaneously every day, even on weekends. Consistency reinforces your body’s natural sleep-wake cycle. You can do this by choosing a bedtime and wake-up time that allows for 7-9 hours of sleep.

2. Create a Relaxing Bedtime Routine

Free A close-up of a hand reaching for a ringing alarm clock, symbolizing waking up in the morning. Stock Photo

Develop a calming pre-sleep ritual like reading, praying, meditating, or taking a warm bath to signal to your body that it’s time to wind down. During this time, avoid social media.

You can also use the time to reflect on your day by journaling and writing about what you look forward to tomorrow.

3. Limit Blue Light Exposure

Avoid screens (phones, TVs, computers) at least an hour before bed. Blue light can interfere with melatonin production, which is essential for sleep.

Just avoid social media and keep your phone at a distance.

4. Keep Your Room Dark and Cool

A dark, cool bedroom (around 60-67°F or 15-19°C) promotes better sleep by mimicking natural nighttime conditions.

Switch off all the lights, but if you do not like sleeping in total darkness, you can switch on a little night light, not too bright.

5. Invest in Comfortable Bedding

Free A woman peacefully sleeping with her pet dog on a soft, furry rug indoors. Stock Photo

Use a supportive mattress, soft pillows, and breathable sheets to create a cozy sleep environment. You always have your bed made in the morning so you can slip into a clean bed at night.

6. Avoid Caffeine Late in the Day

Free Warm coffee mug steaming on a rustic table, evoking cozy morning vibes. Stock Photo

Caffeine can stay in your system for up to 8 hours. Avoid consuming coffee, tea, or energy drinks after mid-afternoon. Stop your coffee after 1 pm so you can be caffeine-free by bedtime.

7. Limit Alcohol Before Bed

Free Man sleeping peacefully on striped bedding, embracing relaxation and comfort. Stock Photo

Though alcohol can make you feel drowsy, it disrupts sleep patterns and reduces sleep quality. It is good sleep hygiene to avoid alcohol before bed.

8. Exercise Regularly

Free A mother and child practicing yoga together at home on a sunny day, fostering wellness and connection. Stock Photo

Physical activity improves sleep, but avoid vigorous exercise too close to bedtime, as it can keep you awake. This means avoiding going to the gym too close to bedtime. Instead, go to the gym in the morning or around 2 pm—6 pm.
What’s most important is that you work out; don’t do it too close to bedtime.

9. Limit Daytime Naps

If you need to nap, keep it to 20-30 minutes in the early afternoon to avoid disrupting nighttime sleep. You can schedule your nap anytime between 12–3 pm, but only for 30 minutes max.

10. Manage Stress and Anxiety

Practice relaxation techniques such as deep breathing, journaling, or mindfulness to calm your mind before bed. On days when you have been too tested, you can enjoy a good crying session before bed. Studies have found melatonin in tears. Melatonin is the night hormone regulated by the circadian rhythm that helps with sleep.

11. Avoid Heavy Meals Before Bedtime

Free A cozy brunch scene with toast, scrambled eggs, sausage, and juice. Stock Photo

After a long day, you might be tempted to reward yourself with an extra bowl of pasta or another slice of cake. However, eating large or spicy meals too close to bedtime can cause discomfort and disrupt sleep.

12. Limit Fluid Intake Before Bed

Reduce drinking liquids an hour or two before bed to minimize nighttime trips to the bathroom. If you go to the bathroom multiple times in the night, it might be time to see your caregiver.

13. Use White Noise or Calming Sounds

Soothing sounds, like white noise or soft music, can help drown out distractions and lull you to sleep. You can also consider playing soothing gospel music as you sleep to set an atmosphere of worship as you sleep.

14. Optimize Lighting Throughout the Day

Get plenty of natural light during the day to regulate your circadian rhythm and signal your body to stay awake when it’s light out. You can also reduce using artificial light during the day and night; try following natural light as much as possible.

15. Avoid Sleeping Pills

Unless prescribed by a doctor, avoid over-the-counter sleep aids, which can lead to dependency or interfere with natural sleep cycles.

16. Practice Gratitude

Free Silhouette of a person with open arms beside a cross at sunset, symbolizing faith and spirituality. Stock Photo

Spend a few minutes reflecting on what you’re thankful for. A positive mindset can help you relax and sleep better.

17. Use Aromatherapy

Scents like lavender, chamomile, or sandalwood can help promote relaxation and improve sleep quality.

18. Reserve Your Bed for Sleep

Avoid working, watching TV, or eating in bed. This helps your brain associate your bed with rest and sleep only.

19. Try Progressive Muscle Relaxation

To release tension, systematically tense and relax each muscle group in your body, starting from your toes and working upward.

20. Seek Professional Help if Needed

If you consistently struggle with sleep, consult a doctor or sleep specialist. Sleep disorders like insomnia or sleep apnea require treatment.

Conclusion

Adopting even a few of these habits can significantly improve the quality of your sleep. Sweet dreams.

Did you find this article helpful? Leave a comment below.

The Incredible Health Benefits of Cabbage: Raw, Cooked, and Juiced

Cabbage might not be the trendiest vegetable, but its impressive health benefits make it a must-have in your diet. Whether raw, cooked, or juiced, cabbage offers numerous advantages for digestion, inflammation, and overall wellness.

This article will discuss why cabbages deserve a spot on your plate and how you can make the most of it.

Health Benefits of Cabbage 

Raw Cabbage

  • It is a nutritional powerhouse packed with vitamin C, fiber, and antioxidants
  • It supports weight management because it is low in calories, making it ideal for salads and slaws
  • Boosts your immunity

Cooked Cabbage

  • Easier on the digestive system
  • Light steaming or stir-frying preserves antioxidants and vitamin K
  • Perfect for soups, stir-fries, and casseroles

Cabbage Juice

  • Juicing cabbage retains most of its vitamins and minerals in a drinkable form
  • It helps flush toxins from the body
  • A traditional remedy for ulcers and acid reflux

1. Cabbage Juice can help with Acid Reflux

Cabbage juice is a natural remedy for acid reflux and ulcers. Its high content of glutamine, an amino acid, helps soothe the stomach lining and promote healing. The juice’s alkalizing properties also balance stomach acid levels, reducing discomfort and preventing flare-ups.

Free Smiling couple shopping for fresh cabbage in a grocery store, emphasizing joy and togetherness. Stock Photo

How to Make Cabbage Juice for Acid Reflux

  1. Chop 2 cups of fresh cabbage

  2. Blend with 1 cup of water until smooth

  3. Strain and drink immediately for maximum benefits

2. Cabbage Helps Keep Inflammation in Check

Cabbage contains compounds like sulforaphane and kaempferol, which have powerful anti-inflammatory properties. Regular consumption can help reduce chronic inflammation associated with arthritis, heart disease, and autoimmune conditions.

Health Benefits of Cabbage Juice

  • Loaded with antioxidants that fight free radicals and delay aging.
  • Assists in flushing out toxins.
  • Potassium in cabbage juice helps balance sodium levels.
  • Cabbage juice is nutrient-dense, hydrating, and a natural energy booster.

3. Improves Digestion

Cabbage is an excellent source of fiber, offering several benefits for digestive health. It helps prevent constipation by promoting regular bowel movements and supports a healthy gut microbiome, essential for overall wellness. Additionally, fermented cabbage products such as sauerkraut and kimchi are rich in probiotics, further enhancing gut health by introducing beneficial bacteria.

Free A close-up view of a hand holding a vibrant sliced purple cabbage against a lilac background. Stock Photo

For optimal digestion:

  • Incorporate raw cabbage in salads.
  • Try steamed or lightly sautéed cabbage to aid nutrient absorption.

Side effects of overeating cabbage

While cabbage is a nutritious vegetable, consuming it in excessive amounts can lead to some side effects

Digestive issues

Cabbage is high in fiber, which, when consumed in excess, may cause bloating, gas, or diarrhea, especially in people with sensitive digestive systems. The sulfur-containing compounds in cabbage can increase gas production, which may be uncomfortable for some individuals. 

People with irritable bowel syndrome (IBS) or similar digestive issues may find that consuming too much cabbage triggers symptoms like abdominal pain or cramps.

Interactions with Blood Thinners

Cabbage is high in vitamin K, which is involved in blood clotting. Overeating cabbage might interfere with anticoagulant medications like warfarin.

Thyroid Function Interference

Raw cabbage contains goitrogens, compounds that can interfere with thyroid hormone production, potentially leading to hypothyroidism if consumed in vast quantities over time.

Blood Sugar Fluctuations

Although cabbage is generally good for managing blood sugar, excessive intake might impact glucose levels in those with diabetes or those taking blood sugar-regulating medications.

To enjoy cabbage’s health benefits without side effects, it’s best to consume it in moderation and incorporate a variety of other vegetables into your diet.

Free Close-up of a halved cabbage on a light blue background, showcasing its fresh and healthy appeal. Stock Photo

How to Incorporate More Cabbage Into Your Diet

  1. Add shredded cabbage to your favorite salad for a crunchy texture
  2. Use cabbage in hearty vegetable soups
  3. Replace tortillas with cabbage leaves for a low-carb wrap
  4. Mix cabbage juice with apple or carrot juice for added sweetness
  5. Include sauerkraut or kimchi as a side dish to meals


Free Close-up of a hand holding a fresh slice of red cabbage against a blue background. Stock Photo

Best Cabbage Casserole

Ingredients:

  • 1 medium head of cabbage, chopped
  • 1 lb ground beef or turkey
  • 1 can diced tomatoes
  • 1 cup cooked rice
  • 1 cup shredded cheese
  • Seasonings: garlic powder, onion powder, salt, and pepper

Instructions:

  1. Preheat oven to 375°F (190°C)
  2. Sauté ground meat until thoroughly cooked; set aside
  3. Layer chopped cabbage in a greased baking dish
  4. Mix cooked beef, tomatoes, rice, and seasonings, then pour over cabbage
  5. Top with shredded cheese and bake for 25-30 minutes until bubbly

Cabbage and Rice Recipe

Ingredients:

  • 2 cups chopped cabbage
  • 1 cup cooked rice
  • 1 small onion, diced
  • 1 clove garlic, minced
  • 1 tbsp olive oil
  • Salt, pepper, and paprika to taste

Instructions:

  1. Heat olive oil in a pan and sauté onions and garlic until fragrant.
  2. Add cabbage and cook until slightly tender.
  3. Stir in cooked rice and seasonings; mix well.
  4. Cook for 5 minutes, and serve as a side dish or light meal.

How to store cabbage properly

Properly storing cabbage can help preserve its freshness, flavor, and nutritional value. Following these tips, your cabbage can stay fresh for up to 2 weeks in the fridge or even longer when frozen.

Keep It Whole for Longer Shelf Life

  • Store the cabbage head whole instead of cutting it, as cutting exposes more surface area to air and moisture, causing it to spoil faster.
  • Place the whole cabbage in a perforated plastic bag or wrap it loosely in a breathable material like paper towels.

Fridge

  • Cabbage should be stored in the crisper drawer of your refrigerator to maintain a calm and humid environment.
  • The ideal temperature for storing cabbage is between 32°F and 40°F (0°C and 4°C).

Avoid Washing Before Storage

  • Do not wash cabbage before storing it, as excess moisture can lead to mold growth or rotting. Wash only when you’re ready to use it
  • If you’ve already cut the cabbage, wrap the remaining portion tightly in plastic wrap or store it in an airtight container
  • Use cut cabbage within 2–3 days for the best quality

Consider Freezing for Long-Term Storage

  • Blanch cabbage leaves or wedges in boiling water for 1-2 minutes, then transfer them to an ice bath to stop cooking.
  • Pat them dry, place them in freezer-safe bags or containers, and freeze for up to 12 months.

Note: Frozen cabbage is best used for cooked dishes as it loses its crisp texture after thawing.

Avoid Storing Near Ethylene-Producing Fruits

  • Keep cabbage away from fruits like apples, bananas, or tomatoes. These produce ethylene gas, which can cause the cabbage to spoil faster.  

Conclusion

Cabbage is more than just a humble vegetable; it’s a nutritional powerhouse that can improve digestion, fight inflammation, and boost overall health. Cabbage offers endless possibilities to enhance your diet, whether you eat it raw in salads, cooked in casseroles, or juiced for its concentrated benefits.

Have you tried cabbage juice or cooked up a delicious casserole? Share your favorite cabbage recipes in the comments below!

Glucocorticoid-Induced Osteoporosis

Your doctor might prescribe you some glucocorticoids, but usually, they prefer to give you a short course to get rid of the inflammation.

Inflammation comes in different ways; it could be an allergy, a gout attack, or something chronic like an inflammatory bowel disorder.

The bottom line is that glucocorticoids (prednisone) work, and they work fast. They have the superpower of getting rid of the inflammation fast.

But why aren’t long-term glucocorticoids the go-to solution?

Doctors are cautious about prescribing them for extended periods due to the numerous potential side effects. This careful consideration is a testament to your doctor’s commitment to your well-being.

One of the side effects that many people don’t remember is that glucocorticoids can eat the bones. Well, a better way of putting it is that, this medication can activate bone-eating (osteoclasts) enzymes that resorb bone. This is called glucocorticoid-induced osteoporosis.

Patients taking glucocorticoids (like prednisone) are at an increased risk of developing glucocorticoid-induced osteoporosis because these medications can interfere with the body’s ability to absorb calcium, decrease bone formation, and increase bone resorption.

However there are some conditions where people have to use glucocorticoids for a long time. For example Lupus and Rheumatoid Arthritis patients. These category of people need to use glucocorticoids for a long time so they need to protect their bones.

How Prednisone Weakens Your Bones

Free Hand X-ray Result Stock Photo

Prednisone affects your bones in a number of ways, which can lead to a condition known as glucocorticoid-induced osteoporosis.

Decreased Calcium Absorption

Prednisone reduces the body’s ability to absorb calcium from food.

Calcium is a critical mineral that helps keep bones strong. Without enough calcium, your bones become more prone to weakness and fractures.

Increased Calcium Loss

In addition to blocking absorption, prednisone also causes the body to excrete more calcium through the kidneys, which leads to a further drop in calcium levels in the bloodstream.

Low calcium triggers the body to pull calcium from the bones, further weakening them.

Reduced Bone Formation

Healthy bones are constantly being broken down and rebuilt.

Prednisone disrupts this balance by decreasing the activity of osteoblasts—the cells responsible for forming new bone. This slows down bone rebuilding, while bone breakdown continues at the same rate.

Increased Bone Breakdown

Prednisone increases the activity of osteoclasts—the cells that break down bone tissue. This speeds up the process of bone resorption, making bones more fragile over time.

How to Prevent Glucocorticoid Induced Osteoporosis

Your doctor probably is aware of the side effects of using glucocorticoids so feel free to mention your concerns and definitely ask your doctor

Calcium and Vitamin D Supplementation

Take enough vitamin D and calcium. Speak to your doctor to confirm your recommended daily does. I wouldn’t be specifying any recommended amount in this posts to ensure everyone is safe.

Bone Density Monitoring

Regular bone mineral density (BMD) testing using a DEXA scan is advised, especially if patients are on long-term or high-dose glucocorticoid therapy. This helps detect early bone loss.

Medications to Strengthen Bones

Bisphosphonates (e.g., alendronate, risedronate) are often prescribed to prevent or treat bone loss. These drugs help slow bone resorption. Teriparatide or Denosumab may be recommended in cases of severe bone loss or if bisphosphonates are not suitable.

Weight-bearing Exercise

Regular weight-bearing exercises such as walking, jogging, or resistance training can help strengthen bones. These exercises stimulate bone formation.

Lifestyle Changes

Avoid smoking and limit alcohol consumption, as both can contribute to bone loss.

Another lifestyle change we recommend is eating healthy. Eat an healthy diet rich in bone-supporting nutrients like Magnesium and Vitamin K

Foods That are Good for the Bone

  • Dairy products (milk, cheese, yogurt)
  • Leafy greens (kale, spinach, collard greens)
  • Fortified plant-based milk (almond, soy, rice milk)
  • Fatty fish (salmon, sardines, mackerel)
  • Almonds
  • Tofu
  • Broccoli
  • Oranges
  • Eggs
  • Fortified cereals
  • Nuts and seeds (chia seeds, flaxseeds)
  • Beans and lentils
  • Figs
  • Prunes

In Conclusion

Prednisone can be a highly effective treatment for many inflammatory and autoimmune conditions, but it does come with potential side effects, especially on your bones.

If you’re taking prednisone, it’s important to be proactive about your bone health. By ensuring adequate calcium and vitamin D intake, staying active, and possibly using medications to protect your bones, you can reduce the risk of osteoporosis and maintain strong bones for years to come.

If you’re concerned about how prednisone is affecting your bones, talk to your doctor. They can help you develop a plan to protect your bone health while managing your condition effectively.

Did you find this post interesting, please leave a comment below


Your Ultimate Guide to Back Hyperextensions

Back hyperextensions are a powerful exercise that target the posterior chain, especially the lower back, glutes, and hamstrings. Do you want to alleviate lower back discomfort? Or would you like to improve your posture? Back hyperextensions offer a myriad of benefits.

This post will discuss the various aspects of back hyperextensions, from proper techniques to equipment options, and how this exercise can contribute to injury prevention, posture improvement, core strength, and much more.

What Are Back Hyperextensions?

Back hyperextensions focus on the posterior chain, a group of muscles including the erector spinae, glutes, hamstrings, and other stabilizing muscles. These exercises work to improve lower back strength, spinal stability, and overall posture.

Contrary to the name, the back isn’t hyperextended in a dangerous way during this movement. Instead, you move into an extended position from neutral, which strengthens the muscles that help maintain proper spinal alignment.

Benefits of Back Hyperextensions

We need a strong core for almost every movement we perform. Back hyperextensions target the erector spinae, which are crucial for maintaining proper spinal posture and preventing injury. Stronger core muscles also contribute to enhanced sports performance and better movement efficiency.

If you are someone who sit a lot, you need this exercise. Sedentary behavior, often associated with sitting for long hours, can lead to poor posture. Back hyperextensions can correct this by strengthening the lower back, helping to realign your spine and improve posture over time.

Strengthening your lower back and posterior chain helps protect the spine and surrounding muscles from injury. Athletes and non-athletes alike benefit from a strong, balanced core and lower back, making hyperextensions an essential exercise for injury prevention.

Hyperextensions also improve muscle endurance in the lower back, hamstrings, and glutes. This is particularly beneficial for athletes and individuals who perform repetitive motions that require strong, resilient muscles.

People who participate in sports that demand lower back strength, like weightlifting, football, or even running, will find that back hyperextensions contribute to improved performance. Enhanced range of motion and better muscle activation directly translate to more power and stability during athletic movements.

Which Muscles Work During Back Hyperextensions

Erector Spinae

The erector spinae, a muscle group that runs along the length of your spine, is the primary muscle engaged during back hyperextensions. By strengthening this muscle, you improve spinal stability and posture, reducing the risk of injury during physical activity.

Hamstrings and Glutes

The hamstrings and glutes are key muscles that get activated as you lift your body back into a neutral position. These muscles are critical for lower back and hip movement, contributing to your overall posterior chain strength.

Hip Extensors

Hip extensors, including the glutes and hamstrings, play a vital role in the lifting phase of a hyperextension. If these muscles are underdeveloped or weak, lower back discomfort is common. Hyperextensions help activate and strengthen these muscles, leading to better core stability.

Different Types of Hyperextension Exercises

90-Degree Hyperextension Bench

The 90-degree hyperextension bench places your body in a fully horizontal position, maximizing resistance as you lift against gravity. This position engages the glutes, hamstrings, and lower back even more intensively than other variations. It’s ideal for individuals with intermediate to advanced core strength, as it demands more control and stability.

45-Degree Hyperextension Bench

A 45-degree bench is more forgiving for beginners. This position reduces the resistance slightly but still provides enough challenge to activate the posterior chain. It’s an excellent introduction to hyperextensions for those new to lower back exercises.

Reverse Hyperextension

In reverse hyperextensions, the movement is inverted, with the upper body staying stable and the legs moving instead. This variation works the glutes and lower back muscles while minimizing strain on the spine. It can be performed on a gym bench or a stability ball, making it accessible even for home workouts.

GHD Machine

The Glute Ham Developer (GHD) machine is another piece of equipment used for hyperextensions. It allows for an extended range of motion and engages the hamstrings and glutes more intensely. GHD hyperextensions are great for building strength in the posterior chain, especially for athletes needing explosive power in their lower body.

Techniques and Form for Hyperextensions

Proper technique is crucial for reaping the full benefits of hyperextensions and avoiding injury. 

Squeeze Glutes

As you lift your body back up, focus on squeezing your glutes. This activates the posterior chain muscles and helps alleviate lower back discomfort.

Tense Abs

Engage your core muscles throughout the movement. By tensing your abs, you reduce the strain on your lower back and maintain better form.

Slow and Controlled Movement

Avoid rushing through hyperextensions. A slow and controlled motion ensures proper engagement of the muscles and prevents injury. Focus on keeping your back straight as you move down and lift back up.

Thigh Pad Alignment

On a hyperextension bench, ensure the top of your hips aligns with the top of the thigh pad. Misalignment can cause discomfort and reduce the effectiveness of the exercise.

Avoid Rounding Your Back

It’s crucial to avoid rounding your back during the descent. Keep your back flat and hinge from the hips to protect your spine.

Weights for Resistance

As you progress, you can add resistance by holding a weight plate during the exercise. Start with a 5kg weight and gradually increase to 10kg or more as you become stronger. Adding weights enhances muscle endurance and strength in the posterior chain.

Equipment Options for Hyperextensions

Hyperextension benches are available for home use, allowing you to perform these exercises without needing to visit the gym. 

The Roman chair is another common piece of equipment for performing hyperextensions. It provides support for your lower body, making it easier to focus on your back and core muscles.

If you don’t have access to a hyperextension bench, a stability ball can be used as an alternative. This option requires more balance and engages the core muscles to stabilize the body during the movement. It’s a great choice for home workouts.

GHD Machine

For those seeking a more advanced challenge, the GHD machine offers a greater range of motion and resistance. This equipment is more commonly found in gyms but can be purchased for home use as well.

Common Mistakes to Avoid in Hyperextension Exercises

1. Going Too Fast

Speed is not the goal in hyperextensions. Performing the exercise too quickly reduces muscle engagement and increases the risk of injury. Focus on slow, controlled movements for optimal results.

2. Arching Past Straight

When lifting back up, avoid arching your back past a straight line. Going too far can strain your lower back and negate the benefits of the exercise. Aim to keep your torso in line with your thighs as you reach the top of the movement.

3. Rounding Your Back

Rounding your back during hyperextensions puts unnecessary strain on your spine. Always keep your back flat and hinge from the hips to maintain proper form.

Hyperextension Exercise Variations

To keep your workouts interesting and challenging, you can try various hyperextension exercise variations. These include:

  • Weighted Hyperextensions
  • Single-Leg Hyperextensions
  • Isometric Holds

Incorporating Hyperextensions Into Your Routine

Back hyperextensions can be incorporated into your workout routine 2-3 times a week. For beginners, start with bodyweight exercises and gradually add resistance as your strength improves. Advanced athletes can perform weighted hyperextensions to continue challenging their muscles.

Hyperextension Workouts for Different Goals

For Core Strength- Perform 3 sets of 12-15 reps of hyperextensions at the end of your workout to target the core muscles.

For Injury Prevention- Incorporate hyperextensions into your warm-up routine to activate the lower back and glutes, preparing your body for heavier lifts like squats and deadlifts.

For Muscle Endurance- Use higher reps (15-20) with lighter resistance to improve muscle endurance in the lower back and hamstrings.

Conclusion

Back hyperextensions are an effective and versatile exercise that provides numerous benefits, from improving core strength and posture to preventing injury. Whether you’re using a hyperextension bench, stability ball, or GHD machine, mastering this exercise can lead to a stronger, healthier body. Incorporate hyperextensions into your fitness routine and enjoy the lasting benefits for your posterior chain strength and overall physical performance.

Did you find this blog post interesting? Leave us a comment


Effective Strategies for Suicide Prevention

Suicide is a tragic and complex act where an individual intentionally ends their own life, often as a result of overwhelming emotional pain or mental health challenges. This pain might stem from depression, anxiety, trauma, chronic illness, or life circumstances that feel unbearable.

In many cases, those contemplating suicide are experiencing such deep distress that they feel there is no other way to escape it. Preventing suicide involves fostering a supportive environment where individuals feel safe, understood, and valued, coupled with access to mental health care and emotional support.

There are numerous reasons why someone might contemplate suicide, often involving a combination of psychological, emotional, and social factors.

Mental health conditions like depression, anxiety, bipolar disorder, and schizophrenia are significant contributors, as they can lead to feelings of hopelessness and despair.

What Makes a Person Think About Suicide

Emotional pain, such as feeling worthless or lonely, can become overwhelming, while trauma or abuse—whether physical, emotional, or sexual—can also be a powerful trigger if left unresolved. Additionally, chronic physical illnesses or unmanageable pain can cause individuals to seek an escape from their suffering.

Life stressors such as financial problems, relationship breakdowns, or the death of a loved one can push someone to the brink, especially if they feel unable to cope. Substance abuse can further complicate matters, often impairing judgment and amplifying mental health issues.

Feelings of isolation, combined with a lack of coping skills, can also heighten the risk of suicide, as can existential crises where individuals grapple with a sense of meaning or purpose in life.

Warning Signs of Someone Considering Suicide

Recognizing the warning signs of someone who may be considering suicide is critical for timely intervention. Emotionally, this may present as persistent sadness, withdrawal from social activities, or noticeable changes in sleep and appetite. You may also notice increased irritability, anger, or a lack of motivation and energy.

Verbally, someone may express feelings of hopelessness, talk about being a burden, or even directly mention thoughts of suicide or self-harm.

Behaviorally, risky actions, like substance abuse or giving away possessions, can signal preparation for suicide. Additionally, neglecting personal hygiene or frequently complaining about physical ailments without a clear medical cause could indicate emotional distress.

If you observe these signs, acting compassionately and without judgment is essential. Reach out to the individual, express your concern, and offer emotional support. Encourage them to seek professional help from a mental health counselor, therapist, or doctor.

Sometimes, simply listening can make a world of difference. If someone is in immediate danger or has a specific plan to harm themselves, emergency intervention is critical. Contact crisis hotlines, mental health professionals, or emergency services to ensure they get the support they need.

Why Is the Topic of Suicide Prevention Important

Talking about suicide prevention is crucial for many reasons. Firstly, it helps break the stigma surrounding mental health issues, making it easier for individuals to seek help without fear of judgment. Open discussions also raise awareness about the signs and symptoms of mental distress, helping people recognize when someone may be at risk.

Additionally, these conversations can highlight resources such as counseling services, hotlines, and support groups, which can assist those in need. By discussing suicide prevention, we can also educate people on coping strategies for managing stress and emotional pain, equipping them with the tools they need to navigate life’s challenges. This education extends beyond individuals, empowering family members, friends, and community members to offer practical support.

Furthermore, early intervention is critical in suicide prevention. Talking about the topic openly encourages people to seek help earlier, leading to better mental health outcomes and potentially saving lives.

It also supports survivors of suicide loss, providing them with comfort and an avenue for healing. Advocacy driven by open discussions can lead to changes in mental health policy and the availability of services, ensuring better support systems for those in need.

Crisis helplines are an invaluable resource for anyone experiencing distress or thoughts of suicide. These services provide immediate, confidential support, 24 hours a day, from trained counselors and crisis responders. For example, in the United States, the 988 Suicide & Crisis Lifeline offers round-the-clock support via phone or text.

In contrast, the Crisis Text Line (text “HELLO” to 741741) provides confidential crisis intervention through messaging. Internationally, Lifeline Australia (13 11 14) and the Samaritans (116 123 in the UK) are also excellent resources, ensuring that no matter where someone is, help is always available.

Reducing suicide risk requires a multi-faceted approach. One of the most important strategies is raising awareness about mental health and reducing the stigma associated with seeking help.

Public education campaigns, alongside supportive environments in homes and workplaces, can encourage individuals to speak openly about their struggles. Making mental health care more accessible is also crucial—expanding resources and integrating mental health services into primary care can make it easier for people to seek help.

Additionally, fostering solid social connections and creating safe spaces for individuals to share their feelings can provide the emotional support they need. Early identification and intervention are essential. Recognizing the warning signs and offering support can prevent a crisis from escalating. In immediate danger, crisis helplines and emergency services provide vital assistance.

Safety planning, such as developing coping strategies and removing access to means of suicide, can reduce risks for individuals at high risk. Another critical step is supporting at-risk populations through targeted interventions, community programs, and peer support groups.

Lastly, follow-up care is essential for individuals who have received treatment for mental health issues, ensuring they continue to receive support and reduce the risk of relapse.

Conclusion

Suicide is a complex issue influenced by a range of emotional, psychological, and social factors. Those struggling with suicidal thoughts often feel trapped and alone, but it is vital to approach them with empathy and understanding. By fostering a culture of openness, supporting mental health care access, and providing education on suicide prevention, we can make a real difference in reducing suicide risks and saving lives.

If you or someone you know is struggling, don’t hesitate to reach out—help is available, and no one should face these challenges alone.

Did you find this article helpful? Leave a comment below

Mastering the T-Bar Row: Benefits, Muscles Worked, Variations, and Common Mistakes

Few exercises are as practical as the T-bar row when building a strong, thick back. This staple in many gym routines delivers a powerful workout that focuses on back development, but it’s so much more than just a back exercise.

In this blog, we’ll explore everything you need to know about the T-bar row, including its benefits, how to do it, common mistakes, and some effective variations to keep your workouts fresh and exciting.

What Does the T-Bar Row Machine Work?

The T-bar row machine primarily targets your back muscles, focusing on the middle and upper back, including the latissimus dorsi, trapezius, and rhomboids. It also engages secondary muscles like the biceps, rear deltoids, and coreto stabilize your body during the motion.

The result? A thicker, more robust back, improved posture, and a better foundation for other pulling exercises, such as pull-ups and deadlifts.

What Does the T-Bar Press Work?

The T-bar press is a less common variation of the traditional T-bar row. This press targets your shoulders, chest, and triceps rather than the back. Instead of rowing the weight toward your body, you’re pressing it upward like an overhead press. This makes it a fantastic compound movement for building upper body strength and can complement your back-focused workouts.

How to Perform the T-Bar Row

The T-bar row is relatively simple to perform but requires good form to get the most out of it and prevent injury. Here’s a step-by-step breakdown:

  • Place a barbell in a landmine attachment or secure one end of the barbell into a corner.
  • Stand over the barbell and grab the T-bar handle or V-handle attachment.
  • Slightly bend your knees, hinge forward at the hips, and keep your back straight with your chest up.
  • Drive your elbows back while squeezing your shoulder blades together, pulling the bar toward your chest.
  • Slowly lower the bar back to the starting position, allowing your arms to extend fully.

Pro tip

Your lower back should remain wholly fixed during the movement. The only part of your body that should move is your arms. Keep your shoulders relaxed at the bottom and tighten them at the top for maximum effectiveness.

Is the T-Bar Row Good for Your Back?

Yes, the T-bar row is excellent for your back! It’s one of the best exercises for targeting the middle and upper back, creating a thick, muscular look. It emphasizes back muscle hypertrophy while improving overall pulling strength, which is essential for functional fitness.

Additionally, because the movement requires a straight back and tight core, the T-bar row helps strengthen your lower back as well, offering a complete back workout.

What Muscles Does the T-Bar Row Target?

The primary muscles targeted by the T-bar row include:

  • Latissimus Dorsi (Lats): The large muscles on the sides of your back that contribute to width.
  • Trapezius: The upper back muscles that extend from your neck to your shoulders.
  • Rhomboids: Located between your shoulder blades, responsible for retraction and squeezing during the row.

Secondary muscles:

  • Biceps: Assist in pulling the bar.
  • Rear Deltoids: Located on the back of your shoulders.
  • Core: Engaged to maintain balance and posture.

Is the T-Bar Row Effective?

Absolutely! The T-bar row is highly effective for back development and can help improve posture, back strength, and overall physique. It’s a compound movement that engages multiple muscle groups, making it an efficient exercise for building upper body strength.

Is the T-Bar Row for the Middle Back?

The T-bar row is particularly effective for targeting the middle back, especially the trapezius and rhomboid muscles. By adjusting your grip (narrow or wide), you can slightly alter the emphasis on different parts of your back.

Why Does My Lower Back Hurt When I Do T-Bar Rows?

If your lower back hurts during T-bar rows, it’s usually a sign that your form is off. Here are some common mistakes:

  • Rounding your back
  • Leaning too far forward
  • Lifting too heavy

To avoid injury, brace your core, keep your back straight, and use an appropriate weight.

How Heavy Should the T-Bar Row Be?

The weight for the T-bar row will vary depending on your fitness level. As a general rule:

  • Start with a lighter weight to master your form.
  • Once comfortable, aim for a weight that challenges you for 8–12 reps.
  • Avoid going too heavy, as this can compromise your form and increase the risk of lower back strain.

Remember, quality over quantity. It’s better to lift a moderate weight with perfect form than to go too heavy and risk injury.

How to Use the T-Bar Machine

The T-bar machine simplifies the movement, offering more stability than a free-weight setup. Here’s how to use it:

  • Adjust the chest pad to fit your height.
  • Position your feet firmly on the platform and grab the handles.
  • Lean forward slightly, maintaining a neutral spine.
  • Pull the handles toward your chest, squeezing your shoulder blades together.
  • Lower the weight back down with control.

The T-bar machine offers a safer, more controlled way to perform the exercise, which can be helpful if you’re recovering from an injury or new to rowing movements.

What Are the Disadvantages of the T-Bar Row?

While the T-bar row is a great exercise, it does have a few potential drawbacks:

  • Lower back strain
  • Limited range of motion
  • Requires equipment

Is the T-Bar Row Better Than Pull-Ups?

Both T-bar rows and pull-ups are practical exercises, but they target the back in slightly different ways.

Pull-ups focus more on width, targeting the lats to give that “V-taper” look.

T-bar rows emphasize thickness, particularly in the middle and upper back.

Neither exercise is necessarily “better,” but incorporating both into your routine can provide a more comprehensive back workout.

11 Effective Alternative for T-Bar Row Exercises

  • Wide-Grip T-Bar Row: Targets the upper back and traps.
  • Underhand Grip T-Bar Row: Emphasizes the lower lats and biceps.
  • Single-Arm T-Bar Row: Allows deeper stretch and unilateral strength.
  • Gorilla Row: Combines a squat position with the T-bar movement.
  • Pendlay Row: A more explosive row with the bar resting on the ground between reps.
  • Seal Row: Performed lying flat on a bench, which eliminates lower back strain.
  • Inverted Row: A bodyweight alternative that’s great for beginners.
  • Cable Row: Simulates the T-bar movement with more stability.
  • Dumbbell Row: A free-weight alternative for added flexibility.
  • Landmine Row: A variation using the landmine attachment without a handle.
  • Chest-Supported T-Bar Row: Reduces strain on the lower back by supporting your chest.

Common T-Bar Row Mistakes

To get the most out of the T-bar row, avoid these common mistakes:

1. Always maintain a slight knee bend for balance and support.

2. Keep your back straight and avoid rounding your shoulders.

3. Focus on using your back muscles, not your arms.

4. You should hinge at the hips, not the waist.

5. Large plates can restrict your range of motion. Opt for smaller plates if needed.

Conclusion

The T-bar row is a fantastic exercise for building a strong, thick back, but it’s essential to maintain proper form and gradually increase weight. You can get the most out of this powerhouse move by incorporating variations and avoiding common mistakes. 

So, grab that bar, tighten up your core, and row your way to a bigger, stronger back!

Did you find this article interesting, leave a comment below.