How to Keep Your Eyes Comfortable in the Sauna

Do you love the Sauna but Hate Dry Eyes?

Saunas are amazing, but they can leave your eyes feeling dry.

4 Simple Tips to Keep Your Eyes Comfortable in the Sauna

Free Warm and inviting wooden sauna with ambient lighting, perfect for relaxation. Stock Photo

  1. Stay Hydrated – Drink plenty of water before, during, and after your sauna session. A good rule of thumb is at least 20 oz. before stepping in to help maintain moisture levels.
  2. Enter Wet – Take a quick shower before your first round and enter with damp hair and skin. Bonus: Keeping your hair wet can help it stay soft and healthy.
  3. Use a Wet Washcloth – Place a damp washcloth over your face to create a moisture barrier.
  4. Close Your Eyes – Whether you’re enjoying a solo sauna or chatting with friends, closing your eyes can help you relax and prevent them from drying out.

With these simple adjustments, you can enjoy all the benefits of a sauna—without the discomfort of dry eyes!

Health Benefits of Using a Sauna

1. Improved Cardiovascular Health

Sauna sessions can improve blood circulation, which helps lower blood pressure and enhance heart health.

Regular sauna use may reduce the risk of cardiovascular disease by improving vascular function.

2. Detoxification

Sweating in a sauna helps eliminate toxins like heavy metals and chemicals from the body through the skin.

3. Muscle Recovery and Pain Relief

The heat from a sauna relaxes muscles and improves blood flow, which aids in recovery after exercise.

It can help reduce joint pain and stiffness, particularly in conditions like arthritis or fibromyalgia.

4. Skin Health

Sweating cleanses the skin by opening pores and flushing out impurities, promoting a healthy glow.

5. Stress Reduction

Saunas promote relaxation by reducing cortisol levels (the stress hormone) and boosting endorphins.

The calm environment provides a mental break, reducing anxiety and improving mood.

6. Improved Sleep

Regular sauna use can enhance the quality of sleep by promoting relaxation and lowering stress.

7. Respiratory Benefits

The warm, moist air of certain types of saunas (like steam saunas) can improve respiratory function, helping with conditions like asthma, bronchitis, or congestion.

8. Boosted Immune System

Saunas may stimulate the production of white blood cells, which can enhance your immune response.

9. Calorie Burn and Weight Loss Support

Although not a replacement for exercise, saunas can increase heart rate, leading to a small calorie burn.

They also help reduce water retention through sweating.

10. Mental Clarity and Relaxation

The heat promotes better blood flow to the brain, which may improve focus and mental clarity.

Precautions

  • Stay hydrated before and after sauna use to avoid dehydration.
  • Limit time in the sauna to 15–20 minutes, especially if you’re new to it.
  • Avoid using saunas if you’re pregnant, have low blood pressure, or have underlying heart conditions without consulting a doctor.

Who Should Avoid the Sauna?

While saunas offer many health benefits, they’re not suitable for everyone. You should avoid sauna bathing if:

  • You are feeling unwell.
  • You have a chronic condition such as severe heart disease, lung disease, inflammation, high blood pressure, kidney disease, epilepsy, or hyperthyroidism.
  • You have a cold, flu, or other infections, especially if symptoms are just starting or already present.

If you’re unsure whether a sauna is safe for you, consult your doctor before using one.

Saunas are a relaxing and effective way to support overall health, provided they’re used responsibly.

Did you find this article interesting? Leave a comment below

Embracing the Spirit of Christmas

Embracing the true spirit of Christmas involves more than just the external festivities—it’s also a time for nurturing joy, health, and personal well-being. 

Before you go on to read, if you haven’t gotten your loved one a gift, we recommend our coloring book.

Best Things to Do on Christmas Day        

1. Volunteering

One of the most fulfilling ways to capture the essence of Christmas is through giving back. Volunteer at a local shelter or organize a gift drive. The joy of helping others brings the true spirit of the season to life.

Utilize your professional skills to support non-profits without leaving your home. Whether graphic design, web development, or digital marketing, platforms like Catchafire allow you to connect with non-profits needing specific skills.

2. Home Decoration

Transform your home into a festive haven. Engage the whole family in decorating the tree, setting up lights, and crafting homemade decorations. This not only beautifies your home but also creates cherished memories.

3. Attend Local Events

Check out local Christmas markets, concerts, or plays. Such events often provide a taste of local traditions and crafts, perfect for embracing the community spirit of Christmas.

4. Virtual Gatherings

For those far from loved ones, virtual gatherings can bridge the gap. To feel connected despite the distance, organize a virtual Christmas dinner or a gift-opening session.

Things you can do with your family if they are far away

When family members are spread across different locations, maintaining strong bonds can be challenging but rewarding with a bit of creativity. Here are several activities you can enjoy together, even when you’re far apart:

  • Virtual Family Dinners or Coffee Dates
  • Online Game Nights
  • Movie Nights with Watch Parties
  • Virtual Book Club
  • Shared Photo Albums
  • Storytelling Sessions
  • Art and Craft Projects
  • Fitness Challenges
  • Learn Something New Together
  • Virtual Tours

These activities help keep the family connected despite the distance and enrich your relationships through shared experiences and new memories.

Healthy Food Ideas for Christmas

1. Roasted Turkey with Herbs

Opt for a roasted turkey seasoned with rosemary and thyme. These herbs are not only flavorful but also healthier alternatives to heavy sauces.

2. Veggie Platters

Brighten your Christmas table with vibrant veggie platters and healthy dips like hummus or yogurt-based sauces.

3. Fresh Fruit Desserts

Instead of traditional heavy desserts, try serving fresh fruit salads or baked apples with cinnamon. These alternatives satisfy the sweet tooth without the extra calories.

4. Seafood Delights

Incorporate seafood dishes like grilled salmon or shrimp cocktails, which are lighter and packed with healthy fats.

Self-Growth Tips for Christmas

Christmas can be an ideal time for self-growth, as it provides a break from the usual routines, a chance to reflect on the year’s progress, and a chance to set goals for the new year.

1. Reflect on the Past Year

Take the time to reflect on what the past year has brought you, including the challenges you’ve overcome and the successes you’ve achieved. This can help you appreciate your growth and set a more informed direction for the coming year.

2. Set New Goals

Use the downtime during the holidays to set personal and professional goals for the new year. These could be related to career advancement, individual skills, health, or relationships.

3. Read and Learn

Christmas break provides an excellent opportunity to catch up on reading, whether it’s books, articles, or educational material that can inspire and motivate you. Consider choosing reads that align with your goals for self-improvement.

4. Start a New Hobby

Picking up a new hobby can be a fulfilling way to expand your skills and interests. Whether learning a musical instrument, painting, or coding, engaging in a new activity can stimulate your creativity and enhance your life.

5. Practice Mindfulness and Meditation

The end of the year is a perfect time to start or deepen a mindfulness practice. Meditation, journaling, or yoga can improve your mental well-being and help you enter the new year with a calm, clear mind.

6. Connect with Loved Ones

Use this time to strengthen bonds with family and friends. Deep, meaningful conversations can offer new perspectives and insights, aiding personal growth and understanding.

7. Digital Detox

Consider taking a break from digital devices to reconnect with yourself and your surroundings. A digital detox can help reduce stress and increase your presence in the moment, allowing for deeper personal reflection and connection.

8. Attend Workshops or Seminars

Look for any workshops or seminars that might be happening during the holiday season, which could provide new knowledge and skills that aid in your personal development.

9. Plan Your Year

Create a vision board or a detailed plan that outlines what you want to achieve in the next year, breaking down larger goals into manageable steps. This can help keep you motivated and on track.

Christmas Beauty Tips

Christmas is also an excellent time to focus on beauty maintenance and self-care, ensuring you look and feel your best for all the festivities.

1. Hydration

With the busy pace of the holidays and colder weather, staying hydrated is crucial. Drink plenty of water to keep your skin hydrated from the inside out. This can help maintain its elasticity and radiance.

2. Moisturizing

Invest in a good quality moisturizer suited to your skin type. Winter air can be dry and harsh, so a heavier, nourishing moisturizer might be needed to protect and hydrate your skin effectively.

3. Sun Protection

UV rays can be harmful even in winter. Apply broad-spectrum sunscreen every morning, especially if you’ll be spending time outdoors or near reflective surfaces like snow.

4. Gentle Skin Care

The festive season often brings late nights and more makeup use. Opt for gentle skincare products that cleanse without stripping moisture. Make sure to remove makeup before bed to prevent breakouts and skin irritation.

5. Exfoliation

Regular exfoliation can help revitalize your skin by removing dead skin cells and promoting cell turnover. Choose a gentle product on your skin to avoid irritation during the colder months.

6. Healthy Diet

Your skin reflects what you eat, so maintain a diet rich in fruits, vegetables, lean proteins, and healthy fats. Foods high in antioxidants can help combat skin damage and give you a healthy glow.

7. Hair Care

Winter can be tough on hair, leading to dryness and breakage. Use a hydrating conditioner and consider applying a weekly hair mask to keep hair shiny and healthy.

8. Sleep

Ensure you get plenty of rest. Sleep is a critical component of health and beauty, helping to repair your skin, refresh your eyes, and improve your overall energy levels.

9. Lip Care

Chapped lips are typical in winter. To keep them smooth and soft, use a hydrating lip balm with ingredients like shea butter or vitamin E, and exfoliate your lips gently with a sugar scrub.

10. Festive Touches

Incorporate some festive colors into your beauty routine. A touch of shimmer on your eyelids, red lipstick, or glittery nail polish can add holiday cheer to your appearance.

Conclusion

Christmas is not just a time for traditional celebrations; it’s also an opportunity for personal growth, maintaining health through nutritious eating, and keeping beauty routines amidst the winter challenges. You can make the most out of the holiday by engaging in virtual activities with loved ones, focusing on self-improvement, opting for healthy festive meals, and taking care of your physical appearance.

Did you find this article valuable?

Back to School Glow Up Tips: The Ultimate Guide for Skincare, Confidence, and Healthy Habits

As the new school year approaches, it’s time to focus on feeling and looking your best. Are you in high school or preparing for your next semester of university? Glowing up before school is not just about your outward appearance but also your confidence and mental health.

In this post, we’ll cover everything from skincare routines and hair care to self-care tips and productivity hacks. If you’re looking for glow up tips, a back-to-school beauty preparation guide, or a healthy routine to boost your confidence, you’ve come to the right place.

What is a Glow Up?

A “glow up” is a transformation for the better, focusing on improving your physical appearance, mental health, and overall lifestyle. It can be gradual or a rapid change. As you prepare for the school year, this glow-up guide will help you set up a plan that includes beauty tips, healthy habits, and a confidence boost so you can start your semester feeling refreshed and empowered.

“Skin glow” refers to the radiant, healthy appearing skin. It’s often associated with smooth, even-toned, and hydrated skin that reflects light well, giving it a fresh and vibrant look. Skin glow is typically a result of proper skincare, balanced nutrition, hydration, and overall well-being.

Why Glow Up Before School?

Starting the school year off with a fresh glow-up gives you a confidence boost, helps you feel more organized, and prepares you mentally for success.

The appearance of skin often plays a key role in self-esteem, body image, and social interactions. A glow-up isn’t just about looking pretty; it’s about taking care of your mental and physical health so that you’re able to handle the demands of school with grace.

Relationship between Skin Glow and Mental Health

In general, the state of your skin can deeply influence how you feel about yourself, shaping your emotional well-being and mental health.

Clear, healthy skin is often associated with confidence and attractiveness, contributing to a positive self-image. Skin conditions like acne, eczema, or hyperpigmentation can lead to feelings of self-consciousness, low self-worth, and embarrassment, especially when visible.

People experiencing skin issues might avoid social situations due to fear of judgment or unwanted attention. They may feel anxious about meeting others, leading to social withdrawal or isolation, which can contribute to depression and anxiety.

Chronic skin conditions (like severe acne) can cause constant psychological distress, especially if treatments are slow or ineffective. The visible nature of these conditions often triggers negative thoughts or worries, leading to increased stress.

Cultural and societal pressures around beauty, which often emphasize perfect, flawless skin, can make people feel inadequate if they don’t meet these standards. This may lead to depression, anxiety, and low self-esteem.

Healthy skin contributes to a more positive self-image, while skin issues can sometimes lead to psychological challenges. Skincare routines themselves can serve as acts of self-care, offering moments of relaxation and mindfulness, reducing stress levels.

Skincare Routine for Glowing Skin

One of the most important aspects of any glow-up is your skincare routine. Many skincare products and treatments are aimed at enhancing skin glow by improving texture, hydration, and tone.

Glowing skin gives you that radiant, healthy look that will help you feel good inside and out. Whether you’re starting your first semester of high school or returning to university life, maintaining healthy skin is key.

Essential tips for achieving a glow up

Good Skincare Routine

For your glow-up, start with a basic skincare routine that you can stick to consistently

Wash your face twice daily with a gentle cleanser, exfoliate twice a week and moisturise.

This face wash helped me clear my acne

Exfoliating removes dead skin cells and reveals the fresher skin underneath. Use an exfoliant two to three times a week to boost skin renewal.

A vey good sugar scrub
A great salt scrub

Eat good food

Eat foods rich in vitamins (especially A, C, E), minerals, and antioxidants, such as fruits, vegetables, and nuts. These foods nourish the skin from within.

Try to eat more citrus fruits, salads and drink fresh juices. Also don’t forget to drink enough water.

Sleep

Do you remember how you feel when you have 2-3 hours of sleep? Grumpy, angry and clumsy. Not getting enough sleep can also affect your skin.

Adequate rest promotes skin repair and regeneration. Getting adequate sleep allows the body to repair itself, reducing the appearance of dark circles and giving your skin a rested glow.

Exercise

Go to the gym often, go on long walks or skip. Physical activity boosts circulation, which helps deliver oxygen and nutrients to the skin, giving it a fresh, natural glow.

Use Sunscreen

Sunscreen is a most have of glowing skin. Since I started using sunscreen my skin condition has improved a lot. Shielding skin from UV damage helps maintain its health and glow. Never skip sunscreen. It protects your skin from UV damage and prevents premature aging.

Sunscreen

Overnight Beauty Tips for Glowing Skin

Overnight skincare is the secret to waking up with fresh, glowing skin.

  • Use a hydrating overnight mask
  • Sleep on a clean, soft silk pillowcase
  • Wake up early so you have some time to yourself to look your best
  • Use a toner to balance your skin

Hair Care Routine for Your Glow Up

Your hair plays a big part in your glow-up journey. Having shiny, healthy hair will not only make you look great, but it will also boost your confidence.

The Essentials

  • Shampoo & conditioner (Once a week)
  • Hair Masks (Once a month)
  • Heat Protection (When you do hairstyles that require heat)

Haircut Transformation

A new haircut can make you feel like a whole new person. Start your glow-up by booking an appointment with your hairstylist. Consider a fresh style, adding layers, or trimming split ends to bring life back to your hair.

For black girls, go get new braids, style your hair differently, get hair supplies and new hair accessories. You can also try wigs for periods when you need you hair to take a break.

Don’t forget to get edge controllers and gels, for a smooth finish every time.

Hair and Makeup for School

For an easy school beauty prep, opt for low-maintenance hair and makeup routines. A simple, ponytail or a corn rows can look chic and effortless.

For makeup, a light touch of foundation, concealer, mascara, and lip gloss is enough to freshen up your face without too much effort.

Healthy Habits for a Glow-Up

Glowing up isn’t just about beauty; it’s about incorporating healthy habits into your daily life. To truly feel good, focus on maintaining a balanced lifestyle that will support your mental and physical well-being.

Drink More Water

Staying hydrated is crucial for both your skin and your overall health. Aim to drink at least eight glasses of water a day to keep your skin glowing and your body functioning at its best.

Stick to a Sleep Schedule

A proper sleep routine is essential for a successful glow-up. Try to get at least 7–9 hours of sleep every night.

To help with this, set a regular bedtime and create a relaxing night routine (like skincare or reading). Also, avoid using electronics an hour before bed.

School Glow-Up Tips

Plan your outfits. Choose outfits that make you feel confident and comfortable. Prepping your wardrobe in advance can save you from last-minute panic.

Wear what makes you feel good. Confidence comes from within, so choose clothes and accessories that reflect your personality.

Quick Beauty Hack

Keep a lip gloss, powder, and mascara in your bag for a quick refresh during the school day.

Semester Preparation for University Students

For university students, the spring or fall semester glow-up is all about balancing productivity, self-care, and managing a busy schedule.

Get Organized

Spend some time to refresh your digital workspace. Update your Notion or Google Calendar to reflect your upcoming semester.

Declutter your digital files, folders, and desktop.

Additionally, create a study schedule that helps you stay on top of assignments.

Mental Health Tips for Your Glow Up

University life can be stressful, so taking care of your mental health is just as important as your physical appearance.

Take Periodic Breaks

Don’t overwork yourself. Make time for breaks and relaxation to avoid burnout. What I found helped me prevent burnt out is working for 45 minutes and taking 15 minutes break. This is the 45/15 rule.

Practice Mindfulness

Meditation and prayer can help you focus and reduce stress. Read your bible, write down your worries and change them to prayer points.

Build a support system of friends, family, or even a counselor to check in on your mental health. Be comfortable sharing your worries with them.

Your Step-by-Step Plan to Glowing Up

Ready for the ultimate glow-up challenge?

Set Your Glow-Up Goals

  • Skincare routine, haircut, and outfit makeover.
  • Drink more water, exercise regularly, and eat healthier.
  • Focus on positivity, reduce stress, and practice gratitude.

Create a Daily Glow-Up Routine

  • Morning Routine– Start with a simple skincare routine, a balanced breakfast, and a positive mindset.
  • Night Routine– End your day with a relaxing self-care routine, a good book, or meditation to recharge for the next day.

Track Your Progress

Use a checklist or a digital app to track your daily glow-up goals – Notion templates are perfect for this.

Celebrate Your Achievements

Glow-ups are a personal journey, so don’t forget to celebrate the small wins. Whether it’s clearing up your skin, staying organized, or feeling more confident, acknowledge your hard work and keep pushing forward.

Conclusion

A glow-up isn’t just about a beauty makeover, and it’s not just about using the best skincare products. It’s about feeling your best inside and out.

Your skin is a reflection of your overall well-being, and factors like stress, poor diet, and lack of sleep can dull your complexion.

By focusing on your skincare, healthy habits, mental health, and personal goals, you can achieve the ultimate glow-up before school and carry that confidence with you throughout the year.

Did you find this helpful? Leave a comment below.

Best Ways to Get Glowing Skin in 10 Days

Achieving glowing skin is not just about the products you apply externally—what you eat, your habits, and your skincare routine all play a crucial role.

In this post, we’ll show you how to get glowing skin in 10 days by focusing on everything from food to scrubs and skincare techniques.

Tips for Glowing Skin

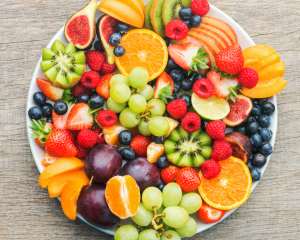
What you eat plays a pivotal role in the health of your skin. Seasonal fruits and veggies are rich in antioxidants and vitamins that fight free radicals, promote cell turnover, and brighten the complexion. Food supplements also offer great benefits.

To get the full benefit from food, eat a balanced diet of antioxidants, such as fruits (berries, citrus) and vegetables (spinach, kale).  Also consider incorporating omega-3 fatty acids (found in fish and flaxseeds) to support skin health.

Top 5 Best Seasonal Foods for Glowing Skin

These foods provide the nutrients, hydration, and antioxidants needed to maintain a radiant complexion.

  • Watermelon
  • Oranges
  • Broccoli
  • Carrots
  • Eggs

Avoid These Food If  You Want Glowing Skin

Stay away fro these foods because they can cause breakouts or promote inflammation

1. Avoid Dairy

Dairy products, especially milk, are known to cause acne flare-ups for some individuals. Try cutting out Dairy for ten days and observe the difference in your skin’s clarity.

Alternatives to Dairy

  • Almond milk
  • Oat milk
  • Soy milk

2. Avoid Sugar and Processed Foods

When you consume excess sugar, it binds to proteins in your body (like collagen) through a process called “glycation,” forming harmful molecules called advanced glycation end products (AGEs).

AGEs damage collagen and elastin, the proteins that keep your skin firm and glowing. Over time, this leads to a loss of elasticity, wrinkles, and a dull appearance.

In addition, consuming high amounts of refined sugars and carbohydrates increases insulin levels in your body. Insulin spikes can stimulate sebum production, the oily substance that can clog pores and lead to acne breakouts. Oily, acne-prone skin often appears less radiant due to clogged pores and blemishes.

Processed foods often lack essential nutrients like vitamins, antioxidants, and healthy fats necessary for maintaining a strong skin barrier.

A compromised skin barrier results in dryness, irritation, and a dull complexion as the skin struggles to retain moisture and protect itself from external irritants.

Processed foods often contain additives, artificial hormones, and unhealthy fats, which may further interfere with hormone regulation and cause skin inflammation and breakouts.

Many processed foods are high in sodium and low in water content, leading to dehydration. When your body is dehydrated, your skin loses moisture and becomes dry and dull, diminishing its natural glow. Hydrated skin appears plumper and more radiant, while dehydrated skin looks tired.

10 Best Skincare Techniques for Glowing Skin

Correctly cleansing your face can make a significant difference.

1. One-minute face wash technique

The one-minute face wash technique involves gently massaging your cleanser into the skin for 60 seconds, ensuring enough time to break down dirt, oil, and makeup.

Use a mild cleanser twice daily to remove dirt and excess oil. Also try to avoid harsh cleansers or over-washing, which can strip your skin of essential oils.

2. Scrub (exfoliate) Twice a Week

Exfoliation is essential for removing dead skin cells and promoting cell turnover. Gently exfoliate 2–3 times during the 10days to remove dead skin cells and reveal brighter skin underneath. Use a gentle chemical exfoliant with AHA (Alpha Hydroxy Acid) and BHA (Beta Hydroxy Acid) or a mild physical scrub. Both AHAs and BHAs are chemical exfoliants, meaning they exfoliate the skin by breaking down the bonds that hold dead skin cells together, allowing them to be easily removed.

This process is much gentler than physical exfoliation (scrubs), which can sometimes irritate or damage the skin. Investing in a good scrub, like a sea salt scrub with kojic acid, can work wonders for your skin’s brightness and texture.

AHA are water-soluble acids that work on the skin’s surface. They are best for normal to dry, sun-damaged, or aging skin. AHA help exfoliate the outer layer of the skin (epidermis), effectively improve skin texture, brightness, and hydration, and reduce signs of aging. Typical examples are lactic acid, glycolic acid, and mandelic acid. Look for these ingredients in your scrub or cleansers.

BHA are oil-soluble acids that can penetrate deeper into the pores. They are best for oily, acne-prone, or combination skin. BHA work inside the pores to clear out excess sebum (oil), dirt, and dead skin cells, making them ideal for treating acne and blackheads. A typical example is salicylic acid.

Tips on using scrubs

  • Scrub gently in circular motions
  • Focus on areas prone to dullness, like the forehead and cheeks.
  • Limit to twice a week to avoid over-exfoliation

3. Facial Masks and Serums

Face masks refine pores, improve texture, and hydrate the face.

Masks lock in moisture and mask constituents, creating a coating on the face. Use hydrating or brightening masks a few times in the ten days (e.g., a sheet mask or a clay mask, depending on your skin type).

Serums also lock in moisture.

They are usually used for skin nourishment, repair, and remedy conditions such as wrinkles and acne. They contain ingredients like vitamin C, niacinamide, or hyaluronic acid that can help boost skin glow.

4. Moisturize Immediately After Showering

Locking in moisture post-shower is essential for glowing skin. After stepping out of the shower, pat your skin dry and apply a quality moisturizer within 3 minutes to seal in hydration.

Use a moisturizer suited for your skin type to lock in hydration and maintain a smooth, soft appearance. Opt for moisturizers with hyaluronic acid or glycerin for extra hydration.

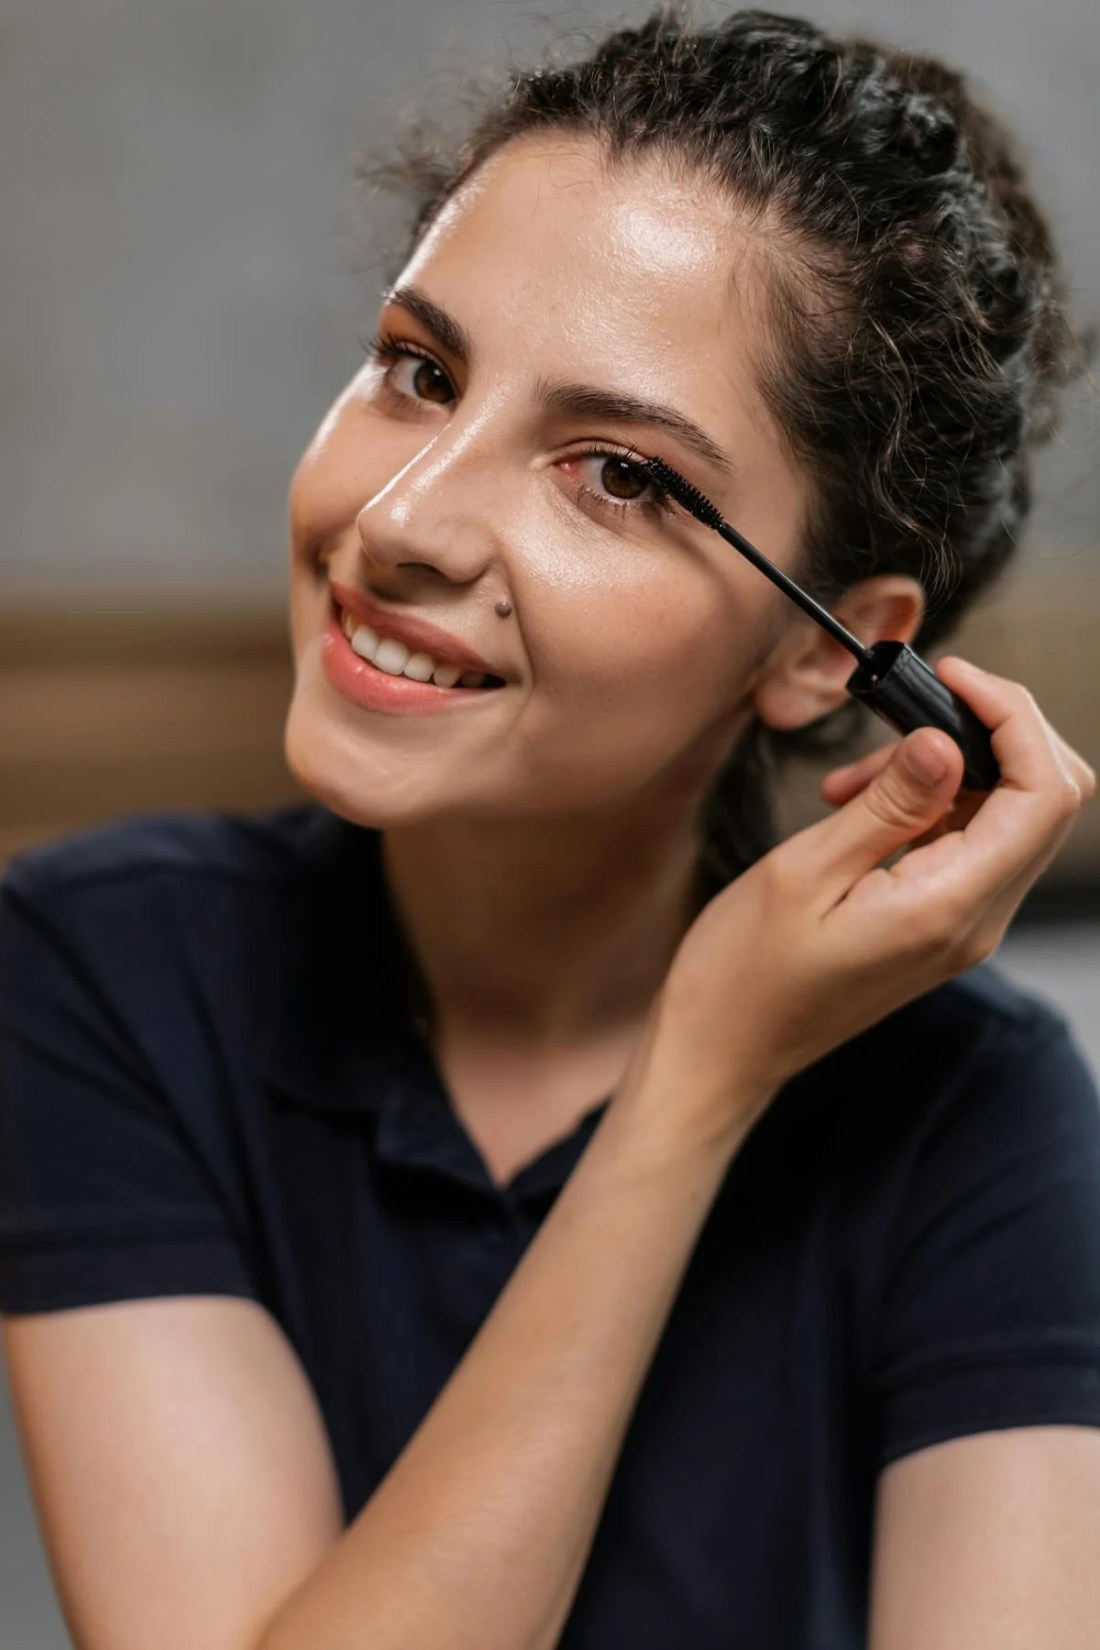
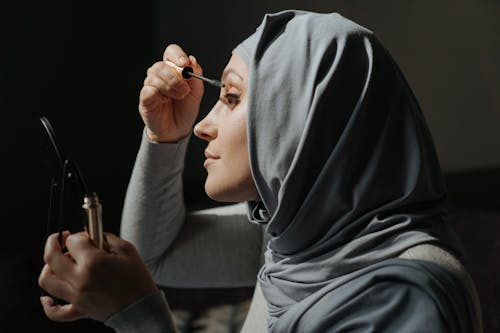
5. Keep Makeup Minimal and Classy

Less is more when it comes to makeup. While makeup can enhance your appearance, overuse can clog your pores and lead to breakouts.

Tips for Minimalist Makeup

  • Opt for lightweight foundations or BB creams.
  • Use neutral shades to give a classy yet natural look.
  • Always remove makeup thoroughly before bed to allow your skin to breathe.

6. Take Cold Showers for Skin Health

Cold showers not only boost your energy levels but also improve skin health. They help tighten pores, reduce puffiness, and boost circulation.

7. Invest in Quality Skincare Products

When it comes to skincare, quality over quantity is vital. One of the highly recommended brands is Avene. Though on the pricier side, their products last long and provide excellent results with minimal product usage.

8. Wear Sunscreen

Sunscreen helps prevent hyperpigmentation and skin damage. Even if you have a deeper skin tone and think your melanin offers protection, Sunscreen is non-negotiable because harmful UV rays can still damage your skin, leading to premature aging, dark spots, and possible skin cancer.

Recommended Sunscreens

Look for broad-spectrum protection with SPF 30 or higher.

9. Drink Lots of Water

Hydration is key.

Drinking plenty of water flushes out toxins from the body and keeps your skin plump and hydrated. Aim for at least 8-10 glasses of water daily to keep your skin glowing.

Another tip is to incorporate foods with high water content, like cucumbers, watermelon, and oranges, into your diet.

10. Make Time for Daily Bowel Movements

This may sound surprising, but regular bowel movements are essential for glowing skin. Pooping every day helps rid your body of toxins that could otherwise cause dullness and breakouts.

Bonus Tips

11. Get Enough Sleep

Aim for 7–9 hours of sleep each night as your skin repairs itself during this time. Poor sleep can cause dark circles, dullness, and inflammation.

12. Manage Stress

Stress increases your cortisol levels.

Cortisol, the primary stress hormone, can cause your skin to produce more oil by stimulating sebaceous (oil) glands. This excess oil can clog pores, leading to acne, breakouts, and a less radiant complexion. Stress can disrupt your body’s ability to retain moisture, leading to dry, dehydrated skin.

Dehydration often results in a dull complexion. Your skin’s ability to repair itself, the regeneration of skin cells, and collagen production are reduced by Stress. This can lead to premature aging, fine lines, and a rough texture.

Stress releases inflammatory chemicals that can lead to flare-ups of skin conditions like eczema, psoriasis, and rosacea. Inflammation can also result in redness and irritation, dulling your skin’s appearance.

Stress also weakens the skin’s barrier function, making it more vulnerable to external aggressors like pollution, UV rays, and bacteria.

A weakened barrier allows moisture to escape, further contributing to dryness and dullness. Free radicals are produced in the body due to stressful conditions.

You can manage Stress by combining physical, mental, and lifestyle strategies. These include practicing mindfulness, meditation, regular exercise, and a proper sleep routine.

The Ultimate 10-Day Diet Plan for Glowing Skin

This diet plan is fail proved. It will give you noticeable glowing skin in 10 days. This plan is an hidden secret that brides use to achieve glowing skin before their big day.

Day 1-3

Breakfast: Eggs, whole grain toast, and an orange

Lunch: Grilled chicken salad with spinach, cucumber, and avocado

Snack: A handful of almonds

Dinner: Grilled salmon, steamed broccoli, and quinoa

Drink: Watermelon smoothie for hydration

Day 4-7

Breakfast: Greek yogurt with mixed berries and chia seeds (Dairy-free option: almond yogurt) – Lunch: Lentil soup with carrots and celery

Snack: Apple slices with almond butter

Dinner: Stir-fried tofu with bell peppers and zucchini

Drink: Freshly squeezed orange juice day

Day 8-10

Breakfast: Smoothie with spinach, banana, and flaxseeds

Lunch: Quinoa salad with chickpeas, cucumbers, and tomatoes

Snack: Handful of walnuts

Dinner: Baked sweet potatoes with grilled chicken and green beans

Drink: Coconut water for extra hydration

10 Best Habits for Glowing Skin

  • Drink 2 liters of water daily
  • Get 7-9 hours of sleep
  • Avoid touching your face
  • Follow a strict skincare routine
  • Use a sea salt scrub
  • Exercise regularly
  • Limit sugar intake
  • Apply a face mask twice weekly
  • Avoid Stress
  • Eat a balanced diet

Get Glowing Skin Overnight

If you need a quick fix, here are some tips to give your skin an overnight glow:

  • Use a sheet mask
  • Sea Salt Scrub
  • Sleep with a humidifier
  • Apply a vitamin C serum

Conclusion

Glowing skin in 10 days is achievable with the proper habits, diet, and skincare routine.

Your result may depend on your starting point, skin type, and the consistency of your routine.

Focus on what goes inside your body and how it responds to it. Follow these proven tips to ensure your skin is radiant, healthy, and glowing in time for your big day. 

Did you find this post helpful? Leave a comment below

Best Budget-Friendly Dandruff Remedies

Dealing with dandruff can be frustrating and often embarrassing, but don’t sweat it—just shampoo it! Well, sometimes. Dandruff comes in different forms, each with its causes and treatments. Whether you’re struggling with dry flakes, an oily scalp, or even scalp fungus, understanding the various types of dandruff and how to treat them is critical to finding relief. 

This post will explore the causes of dandruff and home remedies that save you a quick buck and offer practical, natural solutions to revitalize your hair and scalp. 

But before you dive into treatments, you might wonder, “Do I actually have dandruff, or is my scalp just dry?” We’ll help you differentiate between the two and guide you through what causes dandruff and how to treat it effectively. 

What is dandruff

Dandruff is a condition where the skin on your scalp sheds more than usual, leading to visible flakes of dead skin in your hair, scalp, and shoulders. The white or yellow flakes on the scalp can make your head feel itchy and uncomfortable. Many people experience this at some point in their lives. While it is not a severe health problem, dandruff can be embarrassing and annoying. It can be mild or severe, but it is usually chronic. Dandruff can often be managed effectively with proper care and treatment.

Understanding what causes dandruff and its symptoms can help you find the best ways to treat and prevent it.

Different Types of Dandruff and How to Treat Them

Dandruff is a common scalp condition that can be frustrating to manage. Did you know there are different types of dandruff, each requiring a unique approach to treatment? Understanding your dandruff type is crucial to effectively addressing the problem and achieving a healthier, flake-free scalp.

Dry Skin-Related Dandruff

Characteristics:

  • Small, white, and dry flakes
  • Often accompanied by an itchy scalp
  • Flakes are more noticeable during colder months or in dry climates

Causes:

  • Lack of moisture in the scalp
  • Cold weather
  • Over-washing the hair, stripping it of natural oils

Treatment:

  • Use shampoos designed to hydrate the scalp. Look for ingredients like aloe vera, shea butter, and glycerin.
  • Apply natural oils like coconut or olive oil to your scalp weekly. Massage the oil into your scalp and leave it on for at least 30 minutes before washing it.
  • Reduce the frequency of hair washing to avoid stripping the scalp of its natural oils.
  1. Oily Scalp-Related Dandruff (Seborrheic Dermatitis)

Characteristics:

  • Larger, yellowish, and greasy flakes
  • Red, inflamed, and oily scalp
  • It may extend to other oily areas like eyebrows, sides of the nose, and behind the ears

Causes:

  • Excessive oil production by the sebaceous glands
  • Sensitivity to a yeast called Malassezia, which feeds on scalp oils
  • Stress, hormonal changes, or certain illnesses

Treatment:

  • To control yeast and reduce inflammation, use shampoos containing ingredients like ketoconazole, selenium sulfide, or zinc pyrithione.
  • Incorporate tea tree oil into your routine by adding a few drops to your shampoo or using products containing it. Tea tree oil has antifungal properties that can help control seborrheic dermatitis.
  • Since stress can exacerbate this condition, incorporating stress-reduction techniques like meditation or yoga may help.

Fungal-Related Dandruff

Characteristics:

  • White or yellowish flakes
  • Persistent itching and irritation
  • Often accompanies an oily scalp

Causes:

  • Overgrowth of the yeast Malassezia
  • Warm and humid environments that encourage fungal growth
  • Poor hygiene or infrequent washing

Treatment:

  • Use shampoos with active ingredients like ketoconazole or selenium sulfide that target fungal growth.
  • Dilute apple cider vinegar with water and use it as a final rinse after shampooing. Its acidity helps restore the scalp’s pH balance and inhibits fungal growth.
  • Wash your hair regularly with a mild, antifungal shampoo to keep the scalp clean and reduce fungal buildup.
  1. Product Buildup Dandruff

Characteristics:

  • White or off-white flakes
  • Greasy scalp
  • Heavy, weighed-down hair

Causes:

  • Excessive use of hair styling products like gels, sprays, and mousses
  • Infrequent washing, leading to product residue buildup

Treatment:

  • Use a clarifying shampoo weekly to remove product buildup from your scalp. Avoid overuse, as it can be drying.
  • Like fungal dandruff, an apple cider vinegar rinse can help remove residue and restore the scalp’s natural balance.
  • Limit the use of heavy styling products, and choose lighter, water-based formulas when possible.

Psoriasis-Related Dandruff

Characteristics:

  • Thick, silvery-white scales that often cover the entire scalp
  • Raised, red patches of skin
  • It can extend beyond the scalp to the neck, forehead, or behind the ears

Causes:

  • An autoimmune disorder where skin cells grow too quickly, leading to a buildup of dead skin cells
  • Genetic predisposition

Treatment:

  • Use coal tar or salicylic acid shampoos to slow down skin cell production and reduce scaling.
  • For more severe cases, prescription-strength topical corticosteroids may be necessary to control inflammation.
  • Psoriasis is a chronic condition that may require a specialized treatment plan, including light therapy or systemic medication.

Identifying your dandruff type is the first step to effective treatment. By tailoring your approach to the specific cause, you can manage and even eliminate dandruff, leading to a healthier scalp and more confident you. If over-the-counter treatments don’t work or your dandruff is severe, consider consulting a dermatologist for further guidance.

Symptoms of Dandruff

Dandruff is easy to spot because of its noticeable symptoms. Recognizing these symptoms early can help you take steps to manage dandruff before it becomes more severe. Treating the condition as soon as you notice the signs can reduce discomfort and keep your scalp healthy.

  • Flaky scalp
  • Itchy scalp
  • Oily patches on the scalp
  • Redness and irritation

Difference between Dandruff and Dry Scalp

It is essential to know the difference between dandruff and dry scalp. Dandruff is often mistaken for a dry scalp, but the two differ. While a dry scalp happens because of a lack of moisture, dandruff is usually caused by an overgrowth of a yeast-like fungus called Malassezia or by having an oily scalp. The critical difference is that dandruff flakes tend to be larger and are usually accompanied by an itchy, sometimes oily scalp. 

Is Dandruff Infectious?

Dandruff is not spreadable and cannot be transmitted from person to person through direct contact or shared personal items like combs or hats. However, the condition can be uncomfortable and bothersome. If you have dandruff, managing it through proper scalp care and treatment is essential, but you do not need to worry about spreading it to others.

Can I Inherit Dandruff?

Dandruff itself is not directly inherited, but a predisposition to conditions that can lead to dandruff might be influenced by genetics. If your family members are prone to scalp issues like dandruff or seborrheic dermatitis, you may be more likely to experience similar problems due to inherited traits.

Factors such as skin type, scalp sensitivity, and susceptibility to fungal infections can have a genetic component. For example, if your family has a history of oily skin or conditions that affect the scalp, you might be more prone to developing dandruff.

While you can’t inherit dandruff directly, understanding your family’s history can help you take preventive measures and manage the condition more effectively if it does arise.

How to Get Rid of Dandruff

Getting rid of dandruff might seem challenging, but you can effectively manage and reduce it with the right approach. Here are some of the best ways to treat dandruff

Anti-Dandruff Shampoos

One of the most effective ways to combat dandruff is to use a specially formulated anti-dandruff shampoo. Look for shampoos that contain active ingredients like zinc pyrithione, selenium sulfide, ketoconazole, or coal tar. These ingredients work by reducing the fungus on your scalp, slowing down the production of skin cells, and soothing irritation. Use these shampoos regularly for the best results.

Natural Remedies for Dandruff

If you prefer natural solutions, there are several remedies you can try at home. Tea tree oil is known for its antifungal properties and can be added to your regular shampoo. Apple cider vinegar can also help by balancing the pH level of your scalp, making it harder for yeast to grow. Aloe vera, with its soothing properties, can reduce itchiness and irritation.

Home Remedies for Dandruff

In addition to natural oils and treatments, you can use everyday household items to treat dandruff. Baking soda, for example, can act as a gentle exfoliant, helping to remove dead skin cells and reduce flakes. You can also try a coconut oil massage to moisturize your scalp and relieve dryness.

Best Dandruff Shampoos

Finding the best dandruff shampoo can make a big difference. Choose a shampoo based on your specific needs—whether you have an oily or dry scalp or mild or severe dandruff. For instance, shampoos with ketoconazole are highly effective for severe dandruff, while those with salicylic acid can help with flake removal.

Key ingredients to look for in shampoo:

  • Zinc pyrithione
  • Selenium sulfide
  • Ketoconazole
  • Coal tar
  • Tea tree oil
  • Sulfur
  • Salicylic acid

Regular Hair Care Routine

Consistency is vital in managing dandruff. Wash your hair regularly with an anti-dandruff shampoo, and avoid using harsh hair products that can irritate your scalp. Ensure that you rinse thoroughly to remove any product buildup contributing to dandruff.

Following these tips and treatments can significantly reduce dandruff and enjoy a healthier scalp. Finding the best solution for you might take some time, but with persistence, you’ll see improvements.

Conclusion

Dandruff may be a common issue, but it doesn’t have to be permanent. By understanding dandruff, identifying its causes and symptoms, and using the right treatments, you can effectively manage and reduce this condition.

Did you find this article helpful? Leave a comment below.


7 Quick Fix for Dandruff

Dealing with dandruff can be frustrating, especially when you need a quick solution. Whether you have a big event the next day or just want to feel confident with a flake-free scalp, here’s how you can tackle dandruff overnight using natural and effective remedies you can do right at home.

You’ll discover quick home remedies to cleanse your scalp of dandruff and achieve a flake-free, healthy scalp. For those with curly hair, finding the best dandruff shampoo can be a game-changer, while home remedies to get rid of scalp fungus offer prevention tips that can help stop dandruff at its source.

How to Get Rid of Dandruff Overnight at Home

These overnight dandruff remedies are easy to try at home and provide quick relief. However, consistent care and prevention are crucial to keeping dandruff at bay. If your dandruff persists, consider consulting a dermatologist for further advice.

Tea Tree Oil Treatment

Tea tree oil is known for its antifungal and anti-inflammatory properties, making it a powerful remedy for dandruff. Before bed, mix a few drops of tea tree oil with a carrier oil like coconut or olive oil. Massage this mixture into your scalp, focusing on where you notice flakes most. Leave it on overnight and wash it in the morning with a mild shampoo.

Aloe Vera Gel

Aloe vera has soothing and moisturizing properties that help calm an irritated scalp. Apply pure aloe vera gel directly to your scalp before bedtime, ensuring you cover all affected areas. Not only will it reduce dandruff, but it will also leave your scalp feeling refreshed. Rinse it off in the morning with lukewarm water.

Apple Cider Vinegar Rinse

Apple cider vinegar balances the pH of your scalp and helps remove the buildup that contributes to dandruff. Dilute apple cider vinegar with water in a 1:1 ratio and spray it onto your scalp before going to sleep. Gently massage it in and leave it on overnight. In the morning, wash your hair thoroughly with a gentle shampoo to eliminate the vinegar smell.

Coconut Oil and Lemon Juice

Coconut oil moisturizes the scalp, while lemon juice helps to reduce excess oil and eliminate dandruff-causing fungi. Mix equal parts of coconut oil and freshly squeezed lemon juice. Massage the mixture into your scalp and leave it on overnight. Wash your hair in the morning with a mild shampoo to reveal a cleaner, healthier scalp.

Baking Soda Scrub

Baking soda is a gentle exfoliant to remove dead skin cells and excess oil from your scalp. Create a paste by mixing baking soda with a bit of water. Apply it to your scalp and leave it on for 10-15 minutes before bed. Rinse thoroughly before sleeping. Although this isn’t an overnight remedy, it’s an excellent pre-treatment that enhances the effectiveness of other overnight treatments.

Yogurt and Honey Mask

Yogurt contains probiotics that can restore your scalp’s natural balance, while honey is a natural humectant that helps retain moisture. Mix plain yogurt with a tablespoon of honey and apply it to your scalp. Cover your head with a shower cap to avoid mess, and leave the mask on overnight. Rinse it off with lukewarm water in the morning.

Onion Juice

Onion juice has antibacterial properties that can help fight dandruff. Apply freshly extracted onion juice to your scalp using a cotton ball before bed. While the smell can be strong, covering your pillow with an old towel can help. Wash your hair thoroughly in the morning with a fragrant shampoo.

When to See a Doctor

Household remedies are simple and utilize common ingredients you may already have in your kitchen. While they can be effective for many people, results can vary. If dandruff persists or worsens, consult a healthcare professional for further advice. A dermatologist may prescribe more vital treatments or diagnose underlying skin conditions.

Tips for Preventing Dandruff

Preventing dandruff is often easier than treating it once it appears. By following these simple tips, you can keep your scalp healthy and reduce the chances of dandruff returning.

Keep your scalp clean

Keeping your scalp clean is crucial in preventing dandruff. Regular washing helps remove excess oil, dead skin cells, and any product buildup that can lead to dandruff. If you have an oily scalp, you may need to wash your hair more frequently, using a gentle or anti-dandruff shampoo.

Use Anti-Dandruff Shampoo

Even if you don’t currently have dandruff, using an anti-dandruff shampoo once or twice a week can help prevent it. These shampoos contain ingredients that keep dandruff-causing fungus in check and maintain a healthy scalp.

Avoid Harsh Hair Products

Some hair products, especially those with alcohol or strong fragrances, can irritate your scalp and trigger dandruff. Choose gentle, sulfate-free shampoos and conditioners, and avoid using too many styling products that can build up on your scalp.

Moisturize Your Scalp

A dry scalp can lead to flaking, often mistaken for dandruff. To prevent this, moisturize your scalp using a lightweight oil, such as coconut or jojoba oil, or a moisturizing conditioner. This is especially important during colder months when the air is dry.

Manage Stress

Stress can affect your body in many ways, including triggering or worsening dandruff. To keep your mind and scalp healthy, practice stress-reducing techniques like meditation, exercise, or hobbies.

Eat a Balanced Diet

Your diet plays a significant role in the health of your scalp. Ensure you’re getting enough vitamins and minerals, especially zinc, B vitamins, and omega-3 fatty acids, which are known to support skin health and prevent dandruff.

Protect Your Scalp from the Sun

Too much sun exposure can dry out your scalp and cause flaking. When spending time outdoors, wear a hat or use a leave-in conditioner with SPF to protect your scalp from the sun’s harmful rays.

By incorporating these tips into your routine, you can effectively prevent dandruff and maintain a healthy, flake-free scalp. Prevention is always easier than treatment. Adjusting your lifestyle by taking these steps now can save you from dealing with dandruff in the future.

Conclusion

Regular hair care and preventive measures are vital to keeping your scalp healthy and flake-free. Whether you use anti-dandruff shampoos, natural remedies or make simple lifestyle changes, early action can help you find relief and prevent dandruff from recurring. Don’t let dandruff hold you back; try these tips and treatments and enjoy a healthier, more comfortable scalp. 

Did you find this article helpful? Leave a comment below.


How to Keep Your Lash Extensions Clean and Safely Remove Them

Dirty lashes are not cute at all. You need to clean your lashes so they look fresh. This guide will teach you how to clean your lashes and also how to remove them.

The first step in cleaning your eyelash extensions is choosing the right cleanser. It’s essential to use a product specifically formulated for lash extensions. Regular facial cleansers or makeup removers, especially oil-based ones, can break down the adhesive and cause your extensions to fall out prematurely.

Look for a water-based, lash-safe cleanser. These products are designed to gently remove dirt, oil, and makeup without compromising the bond of the adhesive. They’re also free from harsh chemicals that could irritate your eyes.

You also need to clean your lashes everyday. Here is how to do clean your lash extensions:

Step 1: Remove Makeup  

If you wear eye makeup, start by carefully removing it. Use a lash-safe makeup remover or micellar water on a cotton pad, and gently wipe around the eyes without rubbing the lash line.

Step 2: Apply the Cleanser  

Dispense a small amount of your lash-safe cleanser onto a clean brush or your fingertips. Gently apply the cleanser to your lashes, using upward strokes from the base to the tips. Be gentle to avoid tugging or pulling.

Step 3: Rinse Thoroughly  

Rinse your lashes with lukewarm water to remove the cleanser. Tilt your head back and allow the water to run over your lashes, or gently dab away the cleanser with a clean, damp cloth.

Step 4: Dry Your Lashes  

After rinsing, pat your face dry with a soft towel. Avoid rubbing your lashes. Let your lashes air dry, or use a fan to speed up the drying process. Once dry, use a clean spoolie brush to gently comb through your lashes, keeping them neat and separated.

Avoid Oil-Based Products

Oil is the enemy of lash extensions. It can weaken the adhesive bond in makeup remover, moisturizer, or even eye cream, leading to premature lash loss. Check the ingredients of your skincare and makeup products and opt for oil-free versions whenever possible.

Additionally, avoid touching your face throughout the day, as the natural oils from your fingers can transfer to your lashes. If you need to adjust your lashes, use a clean spoolie brush instead of your hands.

Your eyelash extensions are delicate, so treat them with care. Avoid rubbing your eyes, tugging your lashes, or sleeping on your face. These actions can cause your extensions to become tangled, bent, or even fall out.

When washing your face, be gentle around your eye area. Use a soft cloth and avoid direct, harsh scrubbing. When drying your face, pat your skin dry rather than rub it with a towel.

Brush Your Lashes Daily

Brushing your lashes daily helps keep them looking neat and prevents them from tangling. Use a clean spoolie brush and gently comb through your lashes each morning. Start at the base of your lashes and work your way to the tips. This simple step helps maintain the shape and fluffiness of your extensions.

While cleaning your lashes regularly is essential, keeping them dry between washes is just as crucial. Excess moisture can weaken the adhesive bond, leading to premature lash loss. Avoid excessive exposure to water, such as long showers, swimming, or steam rooms. If your lashes get wet, gently blot them with a towel and let them air dry.

Also, be cautious when using setting sprays or face mists, as these can add unnecessary moisture to your lashes. If you use these products, cover your eyes with a hand or a tissue to protect your lashes.

Additional Tips for Long-Lasting, Clean Lashes

One of the benefits of lash extensions is that you don’t need mascara. However, if you need to apply it, use a water-based, extension-safe mascara and apply it sparingly. Avoid waterproof mascara, as it can be difficult to remove and may damage your extensions.

How to Remove Your Eyelashes (Tip: Don’t!)

You know the sweet feeling you get when you pull out a lash extension? I felt good until I realized I had also pulled out my natural lash. Oh, the terror. So if you’re wondering, “How do you remove eyelashes yourself?” You’ve come to the right place. 

You should only remove your eyelash extensions yourself if you are trained to do so.

Why you shouldn’t remove your eyelash extensions

 The adhesive used to apply lash extensions is stronger than the glue in your average false eyelashes. When you attempt to remove extensions at home, you risk pulling out your natural lashes with them. This can lead to sparse lashes, breakage, and even long-term damage to your lash line.

A friend of mine told me how she pulled out so many natural eyelashes that her lash tech had to send her back when she wanted a new set. Her lash tech asked her to come back after a few weeks because her natural lashes broke and were sparse.

Another reason is your eyes are sensitive, and improper removal techniques can lead to irritation, redness, or an infection. If glue residue or stray lashes get into your eyes, it can cause significant discomfort and require medical attention.

Professional lash technicians are trained to remove extensions carefully and evenly. DIY removal often results in patchy lashes, which can be unsightly and make applying makeup or new extensions challenging.

Given these risks, it’s clear that removing your lash extensions isn’t the best idea. But if you’re still determined, here’s what you need to know.

How to Remove Eyelash Extensions Yourself (But Really, Don’t!)

If you’re still set on doing it yourself, the following steps can help minimize damage. However, remember that this method isn’t foolproof, and the safest option is to visit a professional.

Step 1: Steam Your Face

Start by steaming your face to help loosen the lash glue. Boil some water, pour it into a bowl, and lean over it with a towel draped over your head to trap the steam. Stay there for about 10-15 minutes.

Step 2: Apply an Oil-Based Cleanser

After steaming, apply an oil-based cleanser or coconut oil to your lash line. Oil helps break down the adhesive. Gently massage the oil into your lashes, careful not to tug or pull.

Step 3: Gently Wipe Off the Extensions

Use a cotton pad or clean spoolie to wipe or brush off the extensions gently. If they don’t come off quickly, don’t force them—this is a sign that the glue hasn’t fully broken down.

Step 4: Rinse and Clean

Once you’ve removed as many extensions as possible, rinse your face with warm water and gently cleanse your eyes with a mild, lash-safe cleanser.

Step 5: Moisturize

After removal, it’s essential to condition your natural lashes with a lash serum or castor oil to help them recover from the ordeal.

How to Take Eyelashes Off for Beginners

For beginners, it’s important to stress that removing lashes yourself is risky. If you’re new to lash extensions, the best advice is to seek professional removal. However, if you must try it at home, follow the above steps with even more caution. Beginners are more likely to damage their natural lashes due to inexperience, so patience and gentleness are key.

How Do You Get a Hidden Eyelash Out of Your Eye?

It’s not uncommon for a stray eyelash to find its way into your eye, causing irritation and discomfort.

Always wash your hands thoroughly to avoid introducing bacteria into your eye. Sometimes, blinking rapidly can help dislodge the eyelash. It may also cause your eye to water, which can flush the eyelash out.

If blinking doesn’t work, use sterile saline solution or eyedrops to flush out the eyelash.

If you can see the eyelash, you might be able to remove it using a clean, damp Q-tip or your clean finger. Be extremely gentle to avoid scratching your eye.

How to Remove Glued Eyelashes

If you’re dealing with traditional glued-on false eyelashes, the removal process is more straightforward but still requires care:

Step 1: Soften the Glue

Dip a cotton swab in an oil-based makeup remover or coconut oil and gently rub it along the lash band to soften the glue.

Step 2: Peel Off Gently

Slowly peel the lash strip off your eyelid from the outer corner. If you feel resistance, apply more oil and give it a moment to work.

Step 3: Clean Your Lashes

After removing the lashes, clean your eyelids and natural lashes to remove any remaining glue. 

Step 4: Store or Dispose

If you plan to reuse the false lashes, clean them with rubbing alcohol and store them in their original packaging.

Conclusion

Keeping your eyelash extensions clean is essential for maintaining their beauty and longevity. You can enjoy stunning lashes that last longer and stay healthier with the right products and techniques. Remember, clean lashes are not just about appearance—they’re also about keeping your eyes healthy and preventing potential issues down the line. These tips keep your extensions looking fresh, complete, and fabulous daily. 

While removing your eyelashes at home is possible, the risks often outweigh the benefits. Lash extensions are a luxury and deserve professional care from start to finish. So, the next time you’re tempted to DIY, consider booking an appointment with your lash technician. 

Did you find this article, interesting? Leave a comment below


The Secret to Long-Lasting Lash Extensions

lash, lash extension, beauty

We’ve all been there: you leave the lash salon with a fresh set of extensions, feeling like you can conquer the world with just a flutter of your eyes. But then, days later, you start noticing those beautiful lashes shedding faster than expected. It’s frustrating, not to mention a hit to your wallet, as you’re now considering booking a fill sooner than planned. So, what gives? Why aren’t your lash extensions lasting as long as they should? 

Free Beautiful Woman in Earrings Stock Photo

You might be surprised to learn that there are several strange and unexpected reasons why your lash extensions could be saying goodbye before their time. In this blog, we’re diving deep into the weird and wonderful world of lash retention, uncovering the secrets that might help you keep those lashes looking fabulous for longer.

Why are lashes important? Studies suggest that larger, wider eyes are often considered more attractive. Long lashes create the illusion of bigger eyes, drawing attention and enhancing their perceived beauty. This effect also contributes to facial symmetry, commonly linked to overall attractiveness.


Understanding Lash Retention

Before we get into the nitty-gritty of what could be going wrong, let’s talk about lash retention. Lash retention refers to how long your eyelash extensions stay in place, keeping you looking glamorous day after day. On average, a good set of lash extensions should last 2 to 4 weeks before you need a fill. However, retention can vary based on several factors, and understanding these can help you get the most out of your lash investment.

Poor retention isn’t just about losing your look sooner than you’d like; it also means more frequent visits to your lash technician, which can add time and money. Plus, constantly losing lashes can be frustrating, leading you to question what you might be doing wrong.

Strange Reasons Your Lash Extensions Aren’t Lasting

1. Natural Lash Growth Cycle

Let’s start with the basics. Each natural lash has a unique growth cycle, affecting how long your extensions last. Lashes go through three main stages: the anagen (growth) phase, the catagen (transition) phase, and the telogen (resting) phase. When a lash is in the telogen phase, it’s just waiting to fall out naturally, taking your extension with it.

You might notice that sometimes, after a fresh set of lashes, you start losing them quickly. This could simply be because many of your natural lashes were nearing the end of their cycle when you got your extensions. It’s an entirely normal process, but it can be disheartening if you’re unaware. To maximize retention, scheduling your lash appointments based on your lash cycle is helpful, which your lash tech can help you understand.

You can also try an eyelash serum, trusted to help your natural eyelashes grow longer.

2. Sleeping Habits

Believe it or not, the way you sleep can have a significant impact on your lash extensions. If you’re a side-sleeper or a stomach-sleeper, you could unknowingly press your face—and therefore your lashes—into your pillow throughout the night. This constant pressure can cause your extensions to twist, bend, or even fall out prematurely. I know I am on this table.

Free A Woman Sleeping with a Sleep Mask Stock Photo

To help combat this, consider switching to a silk pillowcase, which is gentler on your lashes (and skin!). You might also want to train yourself to sleep on your back, although we know that’s easier said than done. If you can’t change your sleeping position, a contoured sleep mask that doesn’t press on your lashes can be a good alternative.

3. Skincare Products

Your skincare routine could be another sneaky culprit behind poor lash retention. Many skincare products, especially oil-based ones, can break down the adhesive to attach your extensions. Even harmless products, like certain moisturizers or eye creams, can cause the glue to weaken, leading to premature lash loss.

Take a close look at the ingredients in your skincare products. If you spot anything oil-based, keep it away from your lashes. Instead, opt for water-based or lash-safe products and apply them carefully to avoid your lash line. Also, be mindful when washing your face—avoid splashing water directly onto your lashes and gently clean around them.

4. Hormonal Changes

Hormones are potent chemicals that can significantly impact your body, including your lashes. Changes in your hormone levels—whether due to your menstrual cycle, pregnancy, menopause, or even starting or stopping birth control—can affect your hair growth cycle, including your lashes. 

During certain phases of your cycle, your body might produce more oil, which can break down lash adhesive or cause your lashes to shed faster than usual. Unfortunately, this is one of those factors that’s mainly out of your control, but knowing it can help you understand why your lash retention might vary monthly.

5. Environmental Factors

Your environment can play a surprisingly significant role in how long your lash extensions last. For example, if you live in a hot, humid climate, the extra moisture in the air can weaken the bond of the lash glue. On the other hand, if you’re in a very dry or cold environment, your lashes might become brittle, leading to increased shedding.

Pollution can also affect your lashes. If you’re regularly exposed to high pollution levels, particles in the air can settle on your lashes, breaking down the adhesive or weighing down the extensions. To protect your lashes, try wearing sunglasses outside to shield them from the elements, and consider using a lash sealant to create a barrier against environmental damage.

6. Dietary Choices

You might be surprised to learn that your diet influences lash retention. Like the rest of your body, your lashes need the proper nutrients to stay strong and healthy. A diet lacking in vitamins and minerals—particularly biotin, zinc, and vitamins A, C, and E—can lead to weaker, more brittle lashes that are more likely to shed prematurely.

Incorporating more nutrient-rich foods into your diet can help improve the health of your natural lashes, leading to better retention of your extensions. Foods like eggs, nuts, seeds, leafy greens, and fatty fish are all excellent choices for promoting healthy hair growth, including your lashes. Staying hydrated is vital, as dehydration can lead to dry, brittle lashes.

Free Woman in Gray Hijab Holding Pen Stock Photo

Tips to Improve Lash Retention

Now that we’ve uncovered some of the strange reasons your lashes might not last as long as you’d like, let’s discuss how to improve your retention and keep those lashes looking fabulous for weeks.

1. Establish a Lash Care Routine

Taking care of your lash extensions is crucial for maximizing retention. Here’s a simple routine to follow:

Cleanse

Use a lash-safe cleanser daily to remove any dirt, oil, and makeup that could weaken the adhesive. Be gentle when washing around your eyes, and avoid rubbing your lashes.

Brush

Gently brush your lashes with a clean spoolie brush each morning to keep them looking neat and prevent tangling.

Avoid Oil

Keep oil-based products away from your lash line, and opt for water-based or lash-safe alternatives.

Seal

Consider using a lash sealant to protect your extensions from environmental factors and extend their lifespan.

2. Schedule Regular Fills

Even with the best care, your lash extensions will eventually need a fill. Most lash technicians recommend scheduling fills every 2-4 weeks, depending on how fast your natural lashes grow and shed. Regular fills keep your lashes looking full and help maintain the integrity of your extensions, reducing the risk of damage to your natural lashes.

Consider learning how to do your own lashes. To save some extra money.

3. Consult with Your Lash Tech

If you’re experiencing poor retention despite following all the tips, consulting with your lash technician is a good idea.They can assess your lashes and offer personalized advice based on your needs. They might recommend adjusting the type of adhesive used, switching to a different style of lash extensions, or even tweaking your aftercare routine.

Your lash tech is your best resource for understanding what’s happening with your lashes, so don’t be afraid to ask questions and share any concerns you have.

Conclusion

Lash extensions are a fantastic way to enhance natural beauty, but poor retention can quickly turn them into frustration. By understanding the strange and unexpected factors that can affect your lash extensions, you can take steps to protect your investment and enjoy longer-lasting results.

Remember, everyone’s lashes are different, and what works for one person might not work for another. The key is to find a routine that works for you and to stay consistent with your lash care. You can keep your lash extensions looking fabulous for weeks with extra attention and care.

Frequently Asked Questions (FAQ)

1. How often should I clean my lash extensions?

You should clean your lash extensions daily using a lash-safe cleanser. This helps remove dirt, oil, and makeup that can weaken the adhesive and cause premature lash loss.

2. Can I wear mascara with lash extensions?

Wearing mascara with lash extensions is generally not recommended, especially volume lashes. If you do use mascara, choose a water-based, extension-safe formula and apply it sparingly to the tips of your lashes only.

3. What should I do if I notice my lashes falling out prematurely?

If you notice excessive lash shedding, it’s best to consult with your lash technician. They can help identify the cause and recommend adjustments to your lash care routine or the products you’re using.

By following these tips and understanding the factors that can affect your lash retention, you’ll be well on your way to enjoying beautiful, long-lasting lash extensions. 

Did you find this post interesting, leave a comment below

Watermelon Beauty Tips For Glowing Skin

Watermelon is more than just a tasty summer snack; it’s a skincare gem. It’s full of nutrients that can make your skin glow. With its hydrating and antioxidant-rich qualities, watermelon is a natural way to get healthy, glowing skin.

Free Hand Holding a Slice of Watermelon With Blue Swimming Pool Water in the Background Stock Photo

Watermelon is nature’s juicy skin revitalizer

Watermelon is the perfect summer fruit for skin health and rejuvenation. It’s full of nutrients and properties that help revitalize the skin. This makes it look healthy and glowing.

Packed with Nutrients for Radiant Skin

Watermelon is a powerhouse of vitamins and minerals essential for skin health. It’s loaded with vitamin C, which boosts collagen production, keeping the skin firm and young. It also has vitamin A, an antioxidant that fights fine lines and wrinkles. Plus, it’s a great source of vitamin B6, crucial for cell regeneration and repair. 

A Refreshing Treat for Sun-Kissed Skin

In summer, our skin faces the sun’s harsh rays. Watermelon is a refreshing, hydrating treat. Its high water content soothes and hydrates sun-exposed skin, preventing dryness and irritation.

Enjoying watermelon on a hot day nourishes your skin from the inside out.

Nutrient Benefit for Skin
Vit C Boosts collagen production for firmer, more youthful skin
Vit A Reduces the appearance of fine lines and wrinkles
Vit B6 Promotes cell regeneration and skin repair

Hydrating Properties of Watermelon For Glowing Skin

Hydration is key for a radiant, glowing complexion. Watermelon is a true skin-quenching superstar. It has a high water content that deeply hydrates and nourishes the skin. This makes it plump, supple, and glowing.

Adding watermelon to your summer skincare routine can give you a dewy, luminous complexion that shines with natural beauty.

Watermelon Skin Benefits How it Helps
Hydrates The high water content in watermelon deeply nourishes and replenishes the skin, keeping it plump, supple, and glowing.
Boosts Skin Barrier Watermelon is rich in vitamins and minerals that strengthen the skin’s natural protective barrier.
Improves Skin Tone The antioxidants and nutrients in watermelon work to even out skin tone and texture for a more radiant complexion.
Girl Hiding Behind Watermelon Slice
Anannceemedia (Lummi)

Watermelon’s Rich Antioxidant Profile

Antioxidant Function
Vit A Promotes cell turnover and collagen production, improving skin elasticity and reducing the signs of aging.
Vit B6 Supports the skin’s natural defense system, protecting against environmental damage and free radical-induced aging.

Watermelon’s high water content makes it a great natural moisturizer. It keeps your skin hydrated and plump.

Watermelon is full of amino acids, which are key for skin health and making collagen. This boosts skin elasticity, reducing fine lines and wrinkles.

  • Hydrates and plumps the skin
  • Provides antioxidant protection against free radicals
  • Promotes collagen production for improved skin elasticity
  • Brightens and evens out skin tone
  • Soothes and calms irritated skin

DIY Watermelon Face Masks for Rejuvenation

Revitalize your skin with homemade watermelon face masks. Making your watermelon face mask is easy and fun. It’s like having a spa at home. Here are some simple recipes for different skin issues:

  • For a deep cleanse, blend watermelon, honey, and kaolin clay. Watermelon’s antioxidants and clay’s purifying properties refresh and purify your skin.
  • Mix watermelon, yogurt, and a few drops of vitamin E oil to combat dryness. The hydrating powers of watermelon and yogurt and vitamin E’s nourishing fats quench dry skin.
  • Create a mask with watermelon, lemon juice, and a touch of honey for a brightening boost. Lemon’s natural acids and watermelon’s antioxidants reveal a radiant, even-toned complexion.

Watermelon Juice Is A Refreshing Skin Toner

The water in watermelon cleanses and tones your skin. The antioxidants in it help shrink pores and balance your skin’s pH.

Using watermelon juice as a toner makes your skin feel clean, moist, and glowing.

  • Watermelon juice is gentle and safe for all skin types, even sensitive skin.
  • The natural acids in watermelon smooth out the skin, making it look even.
  • With vitamins A, C, and B6, watermelon juice feeds and brightens your skin, giving it a healthy glow.

Watermelon seeds are also provides great value for skin health.

Watermelon Seed Oil For Soft Skin

Watermelon seed oil is a hidden gem in skincare. It offers many benefits for soft, supple skin. This oil comes from the seeds of watermelon and is full of fatty acids, vitamins, and antioxidants.

Adding watermelon seed oil to your skincare cis easy. You can use it directly on your skin or mix it into serums, moisturizers, or face masks. It’s a versatile oil that can do wonders for your skin.

Watermelon for Acne-Prone Skin

If you’re fighting acne, think about adding watermelon to your skincare plan. This fruit is full of natural astringents that can help acne-prone skin. Its high water content and acidic nature tighten pores, control oil, and gently clean the skin. This reduces blemishes and breakouts.

Here are some easy ways to use watermelon for acne-prone skin:

  • Blend watermelon into a DIY face mask and apply it to clean skin, letting it sit for 10-15 minutes before rinsing off.
  • Use a few drops of watermelon seed oil as a natural astringent, gently wiping it across your face with a cotton pad.
  • Add watermelon juice to your skincare routine as a refreshing toner. It balances your skin’s pH and minimizes pores.

Remember, everyone’s skin is different. It’s important to pay attention to your skin and adjust as needed. With some trial and error, you can use watermelon to fight acne and get the glowing, healthy skin you want.

Not only is it a perfect refreshment on a hot day, but it’s also packed with beauty and health benefits that might just surprise you.

Fresh Watermelon Slices Close-Up
Anannceemedia (Lummi)

Absolutely! Watermelon is full of antioxidants that help fight off free radicals, making it a wonderful natural enhancer for healthy, glowing skin. These antioxidants reduce the signs of aging and can help keep your skin supple and radiant.

Is Watermelon Good for Acne?

Yes, it is! The natural acids found in watermelon serve as mild astringents that can help reduce oiliness and clear up acne. Its anti-inflammatory properties also soothe irritation and redness associated with breakouts.

Is Watermelon Good for Anti-Aging?

Thanks to its high antioxidant content, watermelon is a beneficial fruit for combating the signs of aging. Antioxidants like lycopene in watermelon can help reduce damage from UV light and environmental pollutants, aiding in smoother, younger-looking skin.

Can Watermelon Make Your Skin Glow?

Definitely! Watermelon hydrates and moisturizes the skin due to its high water content, which is essential for maintaining a natural, healthy glow.

Is Watermelon Rich in Collagen?

While watermelon itself isn’t a direct source of collagen, its high vitamin C content does play a crucial role in the body’s ability to synthesize collagen, which is vital for skin elasticity and strength.

Can I Eat Watermelon Every Day?

Eating watermelon every day is generally safe for most people, and its high water content can keep you hydrated and full of vitality. However, moderation is vital, as it is high in natural sugars.

Which Fruit is Best for Anti-Aging?

While watermelon is excellent, berries, pomegranates, and avocados are fantastic choices for their potent antioxidant properties and essential fatty acids that help fight the signs of aging.

Does Watermelon Have Melanin?

No, watermelon does not contain melanin but is rich in lycopene, a pigment that may help protect the skin against sun damage.

Conclusion

Watermelon contains essential vitamins, minerals, and antioxidants that nourish and revitalize the skin. Its high water content helps to deeply hydrate and plump the skin, reducing the appearance of fine lines and wrinkles.

Watermelon’s robust antioxidant profile, featuring vitamins A, C, and lycopene, acts as a shield, protecting the skin from free radical damage and premature aging. By adding watermelon to your skincare routine, you can experience its soothing, calming, and skin-improving benefits.

Watermelon-infused face masks and toners provide a refreshing and rejuvenating boost to your complexion.

Did you find this article interesting? If yes, leave a comment below.